WordPress Export Import Single Page, Post, Custom Post feature in WP Ultimate CSV Importer enables effortless migration of your records between environments, such as from a development site to a live site. You can export and import records directly from the edit or create a view inside WordPress, making creating a backup easier and instantly importing stored backups within seconds.
Note: This feature works like a migration tool, you must first export the record before importing it. It supports only CSV format for now.
How to Export a Page/Post/Custom Post #
Follow these step-by-step processes to export individual content:
Step 1: Navigate to the Content #
Go to the post, page, or custom post you wish to export.
Step 2: Access the Import/Export Menu #
While editing the content, locate the Import/Export menu in the top-right corner.
Step 3: Switch to the Export Tab #
Click the menu to open a sidebar displaying two tabs: Import and Export. Here, switch to the Export tab.

Step 4: Export the Content #
Click the ‘Export CSV’ button. The content will be downloaded as a CSV file and saved to your device.
Note: If the selected content has no data or is unpublished, you’ll receive an alert: “Invalid or unpublished post ID.”
How to Import a New Page/Post/Custom Post #
Use the following steps to import content from a CSV file.
Note: The headers in the exported file should match the import file headers to perform import correctly. Any changes in the file header names will cause some issues while import. So it’s best to use the exported file, just change the data in it and import.
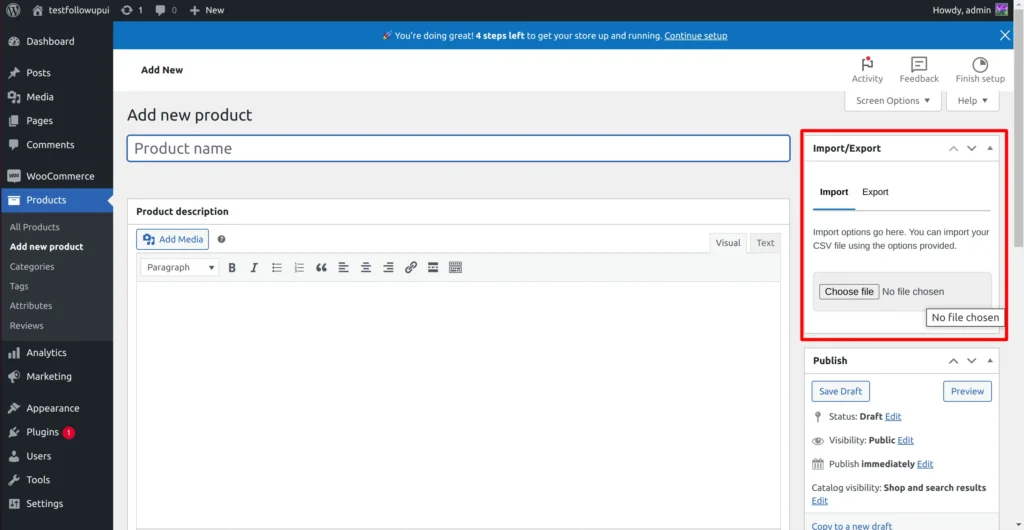
Step 1: Navigate to Add New Content #
Go to Add New in your WordPress dashboard for the desired content type (page, post, or product).
Step 2: Access the Import/Export Menu #
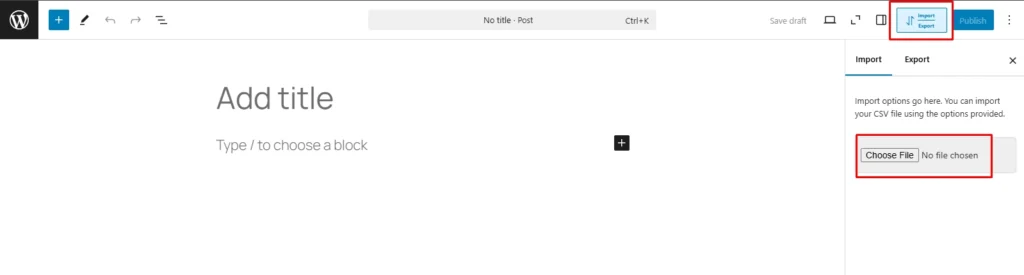
Locate the Import/Export menu in the top-right corner. Click on it to open a sidebar.
Step 3: Upload the CSV File #
In the Import tab, click Choose File to upload the exported CSV file. Select the file and click Open.
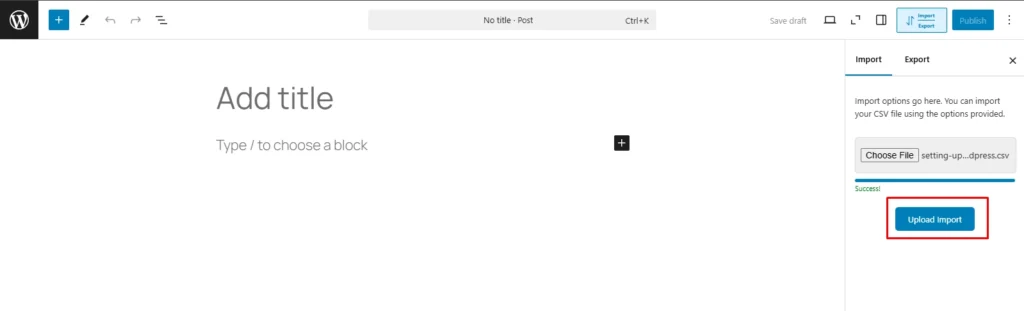
Step 4: Import the Data #
Upon successful file upload, click Upload Import.
A success message will appear like this: “Inserted Post [ID]. Click here for the Redirect link.”
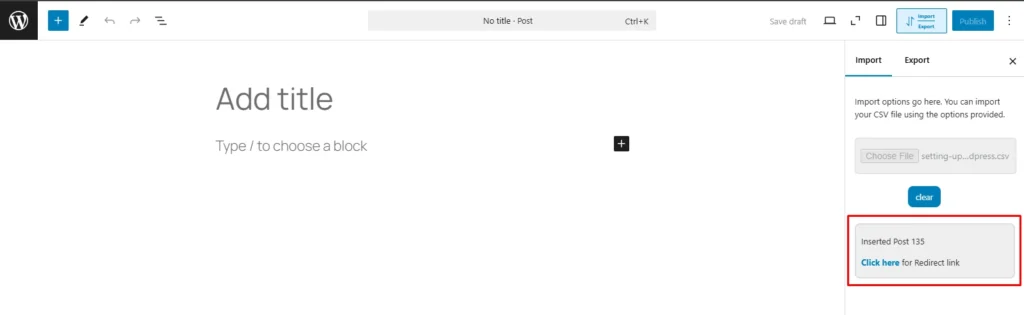
Click ‘Click Here’ to view the newly imported content in a new tab.
Step 5: Start a New Import Process #
Click the Clear button to reset the process and start a new import.
Note: If importing from an existing post or page edit view, follow the same steps.
WP Ultimate CSV Importer Pro
Get Ultimate CSV/XML Importer to import data on WordPress faster, quicker and safer.
How to Export Import a Single WooCommerce Product with WP Ultimate CSV Importer #
Easily migrate individual WooCommerce products between websites using the one-click import/export feature available directly from the product create or edit view. Follow the steps below to export and import a single WooCommerce product.
Note: This feature supports simple, grouped, external, and variable products (with attributes). However, it does not currently support exporting/importing product variations.
Export a Single WooCommerce Product #
Step 1: Access the Product Record #
Navigate to WooCommerce > Products in your WordPress dashboard and select the product you want to export.
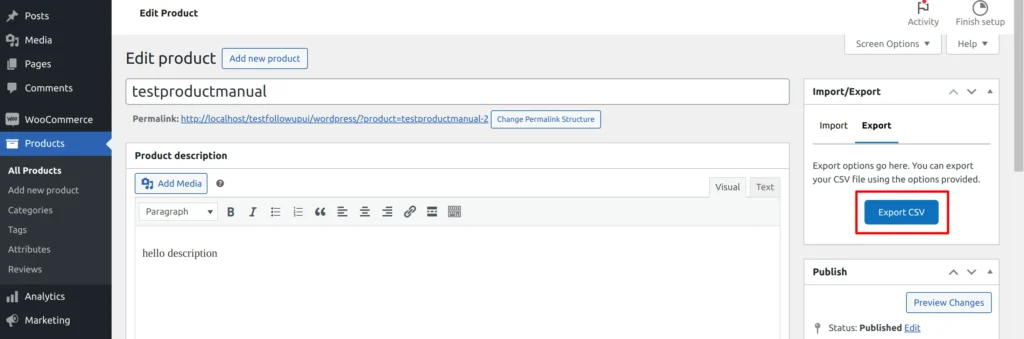
Step 2: Locate the Import/Export widget #
Open the desired product in the edit view. Look for the Import/Export widget on the page (refer to the screenshot for guidance).
Step 3: Export the Product as a CSV #
Click the Export tab in the widget and simply click the Export CSV button. Enter a file name when prompted, then download it to your device.
Import Single WooCommerce Product #
Step 1: Navigate to the Add New Product Page #
Go to your WordPress dashboard and select WooCommerce > Products > Add new product.
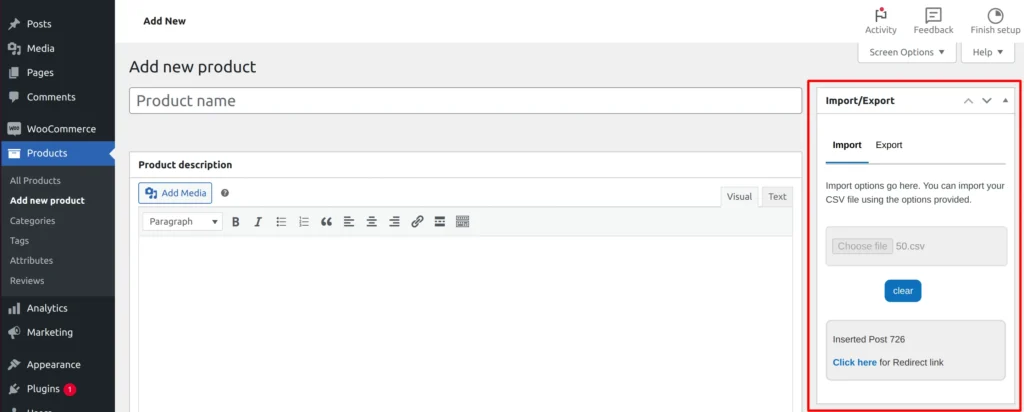
Step 2: Find the Import/Export widget #
Locate the Import/Export widget on the Add New Product page. By default, the widget will display the Import area.
Step 3: Upload the Exported Product File #
Click the Choose File button. Select the previously exported product CSV file from your device and click open.
Step 4: Start the Import Process #
After you receive the successful upload message like below after the file upload. Click the Upload Import button to start the import process. The process will be completed in a few moments.

Step 5: Verify the Imported Product #
Once the import is complete, you’ll see a message:
‘Inserted Post ID. Click Here for the Redirect Link. Click the Click Here button to view the newly imported product. Verify that all product fields, including attributes, pricing, and metadata are imported correctly.
Use the Clear button on the widget to reset the form and start a new import, if needed.
WP Ultimate CSV Importer Pro
Get Ultimate CSV/XML Importer to import data on WordPress faster, quicker and safer.
Advanced Topics #
Single CSV Import/ Export for Multiple Editors #
To handle image import/export for multiple editors such as Classic Editor and Gutenberg Editor using WP Ultimate CSV Importer PRO, follow the steps below:
Importing Images in Classic Editor: #
- Prepare Your CSV File:
- Include a column for image URLs in your CSV file (e.g., featured_image_url).
- Make sure the image URLs are absolute links (including the full URL path to the image hosted on your server or an external source).
- Mapping CSV Columns:
- When uploading the CSV file, during the import process, map the featured_image_url column to the Featured Image option in the WP Ultimate CSV Importer PRO interface.
- Ensure that you map any other custom fields for images correctly (e.g., image gallery or media attachments).
- Enable Image Downloading:
- In the Import Settings, enable the option to download images from the URL provided in the CSV file.
- This will fetch the images from the URLs and associate them with the posts or pages in the Classic Editor.
- Import:
- Complete the import process and verify that images are correctly linked to posts/pages in the Classic Editor by checking the Featured Image section in the Post Editor.
Importing Images in Gutenberg Editor: #
- Prepare Your CSV File:
- For Gutenberg blocks, ensure that your CSV file contains a column for images in your post content (e.g., image_url).
- The image URLs should be placed within the post content wrapped in HTML <img> tags
Mapping CSV Columns:
- During the import, map the image_url column to the Post Content or any relevant block-specific custom field if you’re using a block editor setup.
- Ensure to map the post content column where the images are embedded directly into the Gutenberg blocks.
- Image Downloading Option:
- Enable the Download Images from URL option to ensure that external image URLs are fetched and uploaded to your WordPress media library.
- WP Ultimate CSV Importer PRO will then replace the URLs in the post content with the appropriate internal image URLs pointing to the WordPress media library.
- Import:
- Complete the import process and verify that the images appear in the correct blocks and are accessible in the Gutenberg editor.
Exporting Images from Classic and Gutenberg Editors: #
- Export Images for Classic Editor:
- In the WP Ultimate CSV Importer PRO export settings, select the Featured Image column to export.
- The exported CSV will contain the image URLs that are linked to each post/page in the Classic Editor.
- You can include additional custom fields related to images (e.g., image galleries or attachments).
- Export Images for Gutenberg Editor:
- When exporting posts with Gutenberg content, ensure you export the Post Content or custom fields that store image URLs within the block content.
- The exported CSV file will contain the image URLs embedded in the content (e.g., HTML <img> tags inside the content).
Key Considerations: #
- Image Handling: WP Ultimate CSV Importer PRO handles both external and locally hosted images. When importing, make sure the images are accessible via URL, or enable the downloading feature to fetch external images.
- Editor-Specific Formatting: When dealing with the Gutenberg editor, ensure that image URLs in the content are placed within Gutenberg blocks and properly mapped. For Classic Editor, it’s a simpler setup where the image is typically the featured image.
By following these steps, you can easily import and export images for both Classic and Gutenberg editors separately using WP Ultimate CSV Importer PRO.
Gutenberg Block Support:
- Import and export Gutenberg-specific content (blocks, reusable blocks, block patterns).
- Ensure compatibility with various block types like custom blocks or third-party blocks.
Advanced Metadata Mapping:
- Map advanced custom fields (ACF) or other metadata specific to Classic or Gutenberg blocks.
- Support for custom taxonomies and post relationships in both editors.
Compatibility with Gutenberg’s Dynamic Content:
- Managing dynamic content (e.g., embedded shortcodes, dynamic images) during imports.
Custom Field Handling in Both Editors:
- Mapping complex custom field data across both editors, ensuring fields are correctly matched and imported.
Batch Import/Export for Custom Post Types:
- Advanced import/export capabilities for custom post types and their associated content in both Classic and Gutenberg formats.
Content Validation During Import:
- Implementing stricter content validation (e.g., ensuring data integrity and proper format for both Classic and Gutenberg posts).
User Role-Specific Import Permissions:
- Assigning import/export permissions based on user roles, allowing content import/export for specific post types only accessible by specific roles in either editor.