To import posts on WordPress websites, navigate to WP Ultimate CSV Importer Pro -> Import/Update. Upload the desired file and choose Posts. With our drag-and-drop or advanced mapping, map the incoming CSV field header and target post field. Once done, run the import.
Step 1: Initiate a new import for WordPress posts #
Navigate to WP CSV importer -> Import/Update. Upload the desired file you need to import.
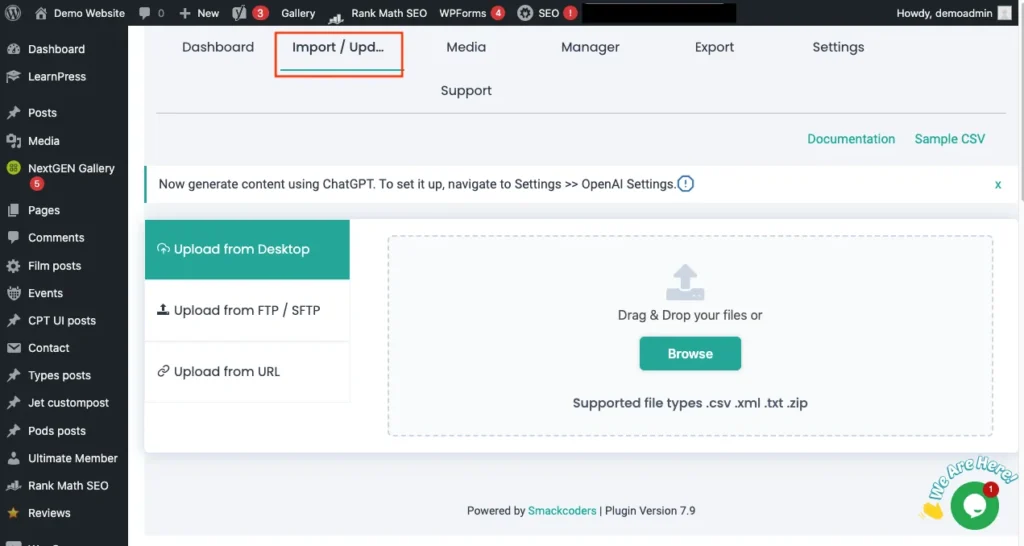
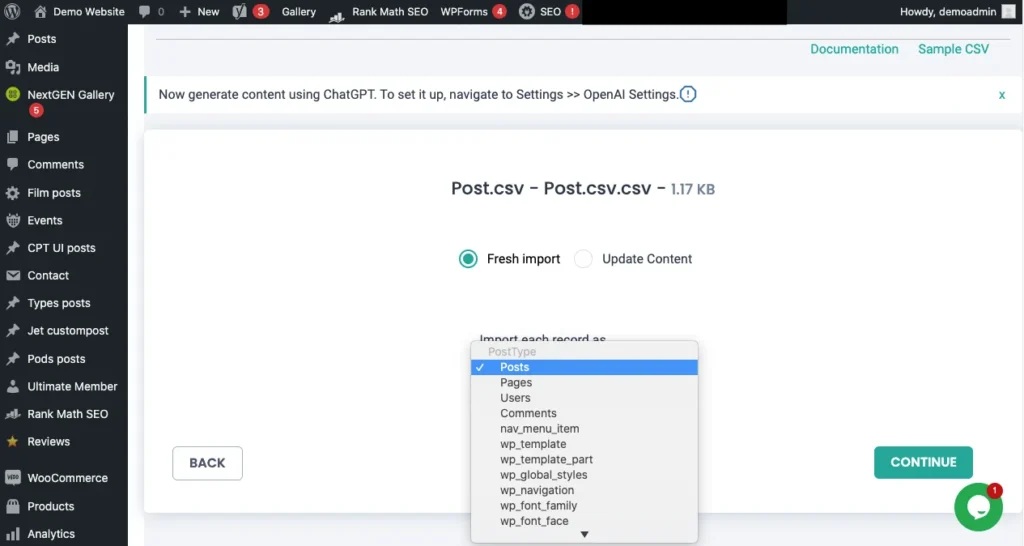
Select the Fresh Import option to initiate the new import. Choose the data type as Posts from the drop-down menu. Click on Continue.
Step 2: Map the CSV header field with the desired WP fields #
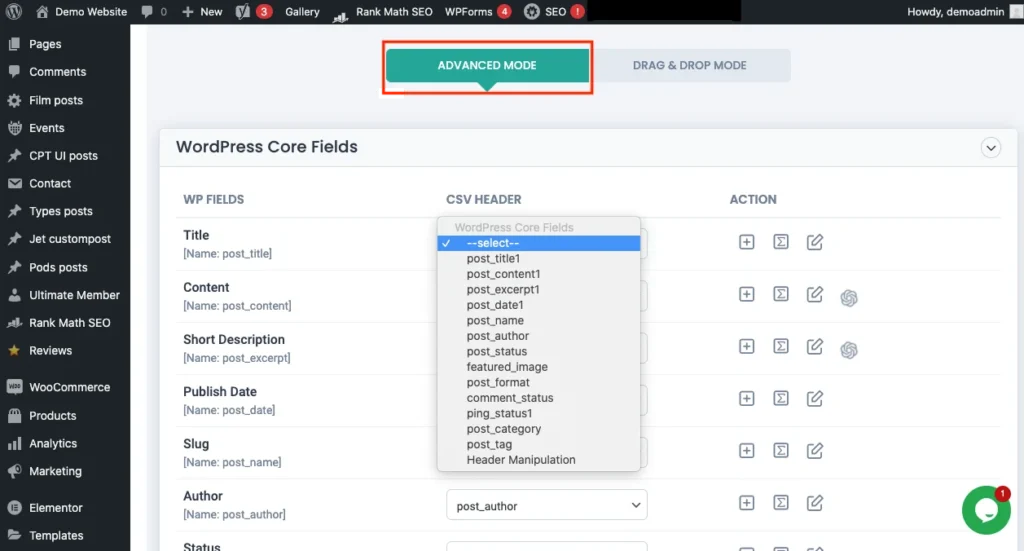
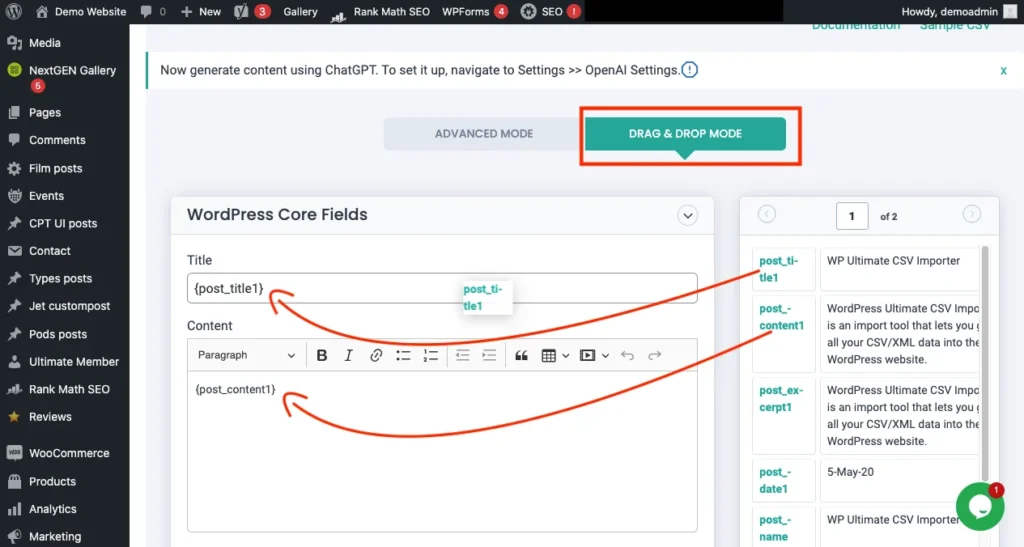
In the Mapping section, you have two different types of Mapping -> Advanced mode and drag and drop mapping. The mapping section helps you to build the import template.
Advanced Mode: Map the WP fields by selecting the desired CSV header fields from the drop-down.
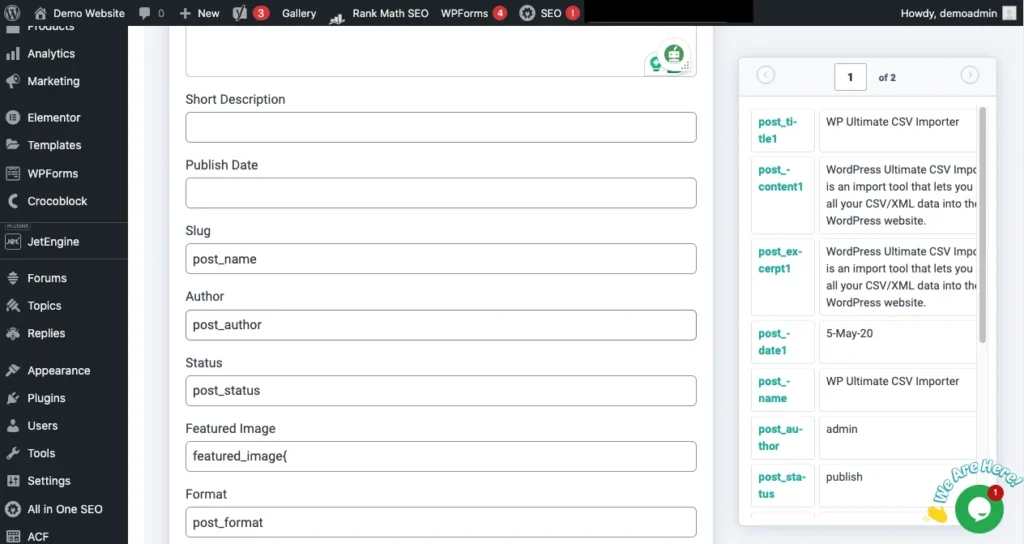
Drag and drop mode: Here, drag the desired CSV header field from the right side menu and drop it on the appropriate WP fields on the left side.
Choose any one type of Mapping, and Map the title, content, short description, and other related fields of your posts.
Create custom fields:
Here you can create the custom field mapping for any custom fields that you want to import on your posts.
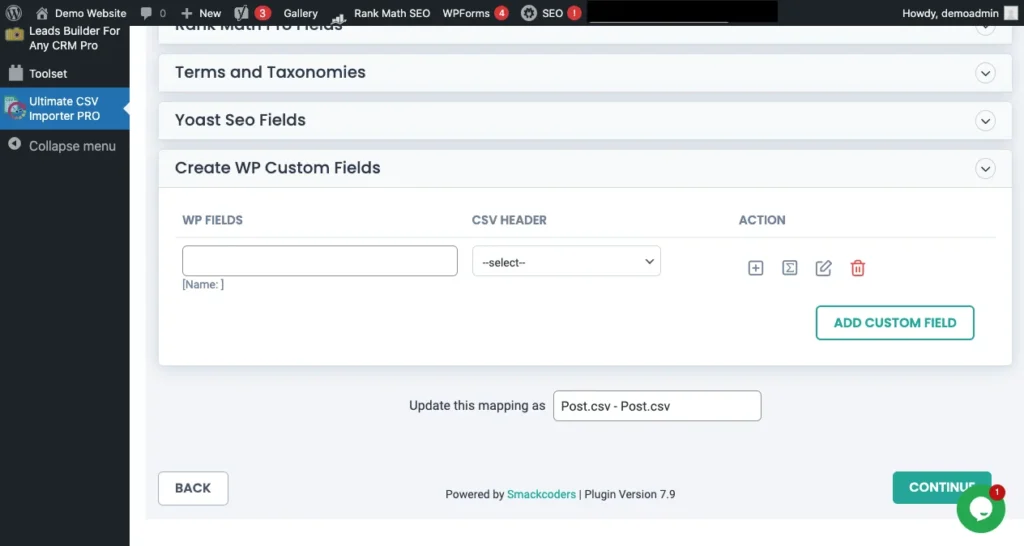
Map other post-import elements such as slug, author, dates, status, publish date, etc.
Step 3: Manage media uploads #
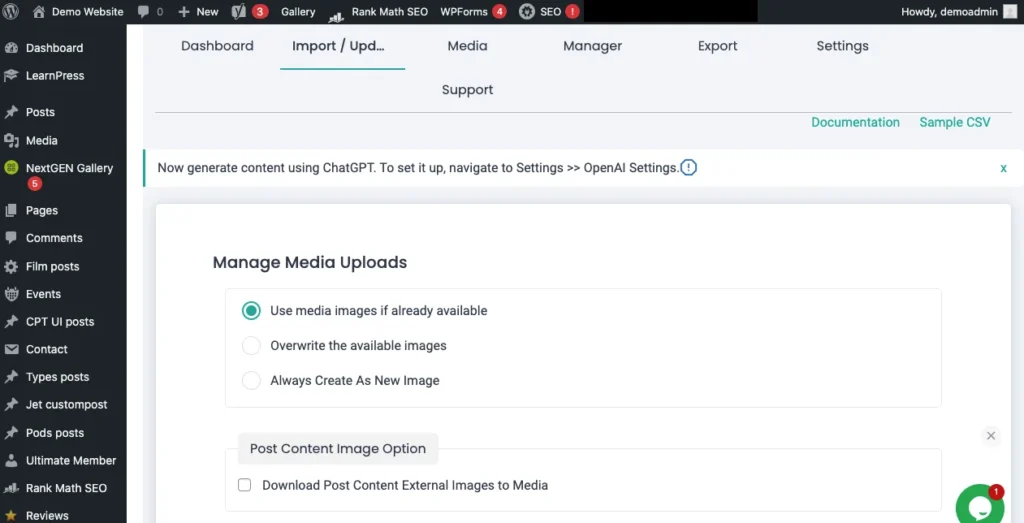
It is flexible to configure the media uploads on your post-import. Select the desired media upload options based on your needs:
- Upload the media images if already available
- Overwrite the available images
- Always create a new image
Step 4: Configure the Import Settings #
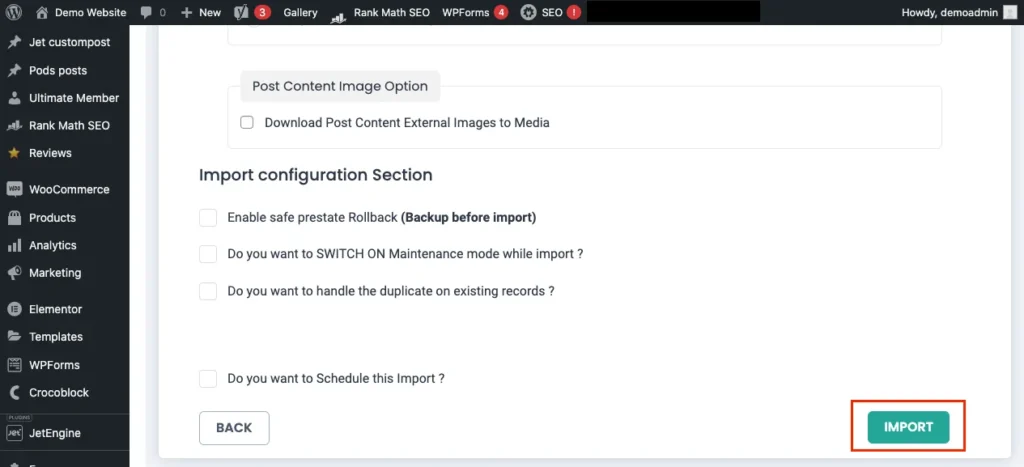
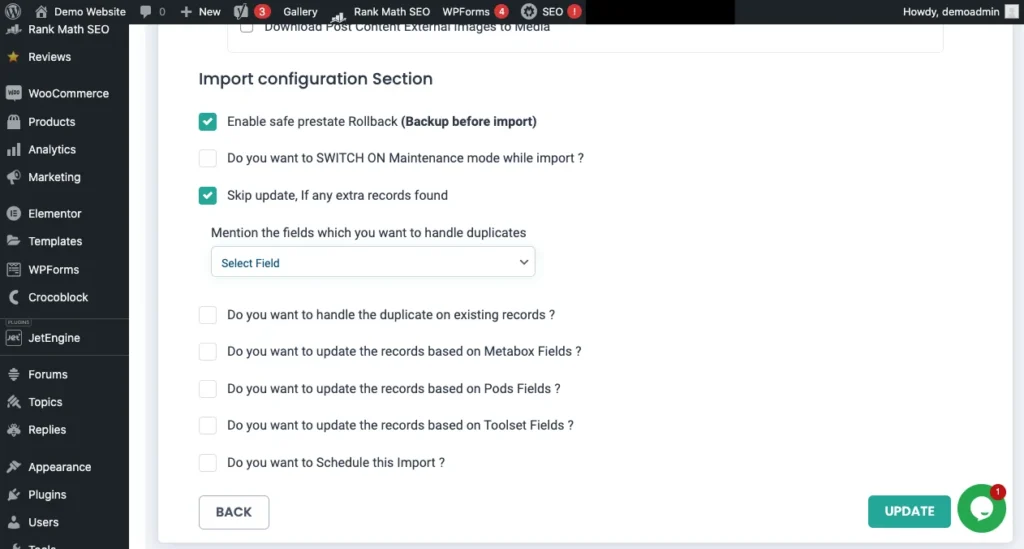
The import settings configuration is the step before the final step of running the import. From here you can configure the settings of your post import with the Rollback option( backup before import) and can switch on the maintenance mode while importing.
Step 5: Run the Import #
Click on Import, once you are done with import configuration settings.
The import progress will be displayed on the screen. When the import is completed, you can see the import summary to view and edit posts.
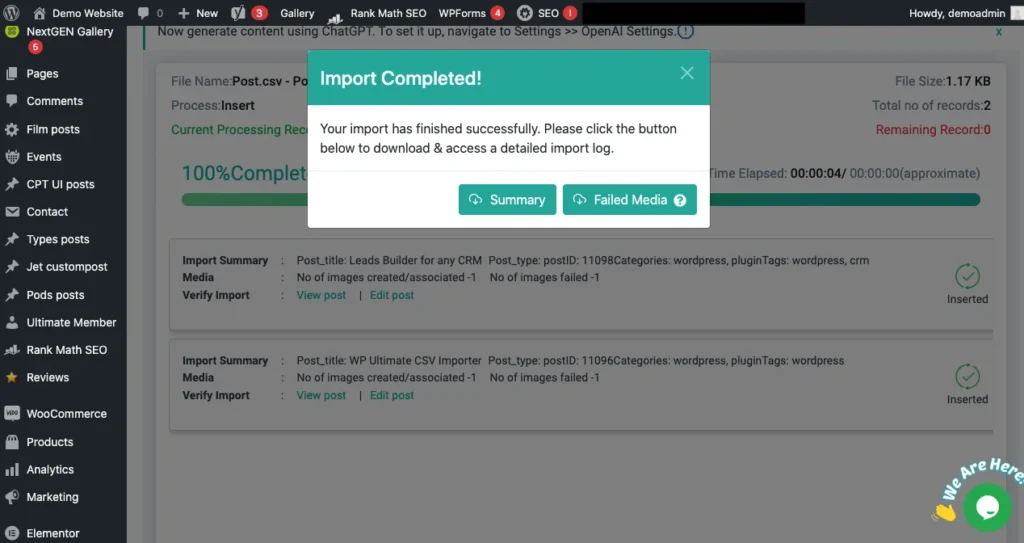
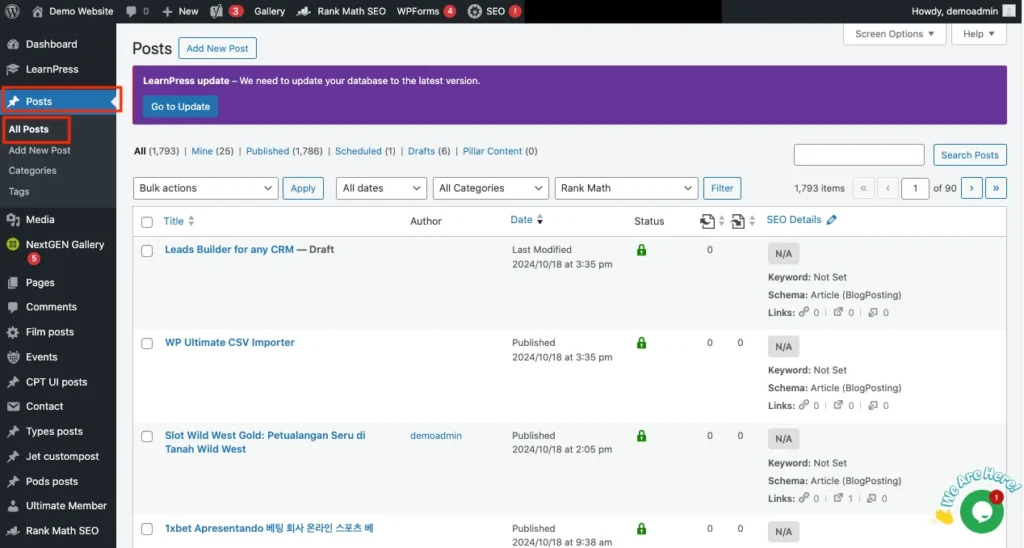
Step 6: Verify the Post import #
Review the post import by navigating to the Posts-> All posts
How do you update WordPress posts from a CSV? #
The update process is the same as that of the post-import.
- Navigate to WP CSV importer -> Import/Update
- Browse the desired CSV of your posts that you need to be updated
- Select the “Update content” option.
- Now choose Posts from the drop-down. Click on Continue
- Map the fields if necessary or choose the existing mapping template. Click on Continue.
- You can manage the media uploads and configure update settings.
Update Post with efficient duplicate handling #
On the import configuration section, you can enable the “Do you want to handle the duplicates on existing records”. You can select the fields (post title, post_id, and post name) based on which you want to update your posts.
For example, if you select post_id, then your wordpress posts will be updated based on the post_id on your csv
Import Post on WordPress- Advanced Features #
Import posts of different file types. #
WP Ultimate CSV importer allows you to import WordPress posts with different file types. The supported file types include CSV, XML, TXT, and zip.
How to schedule WordPress Post Import? #
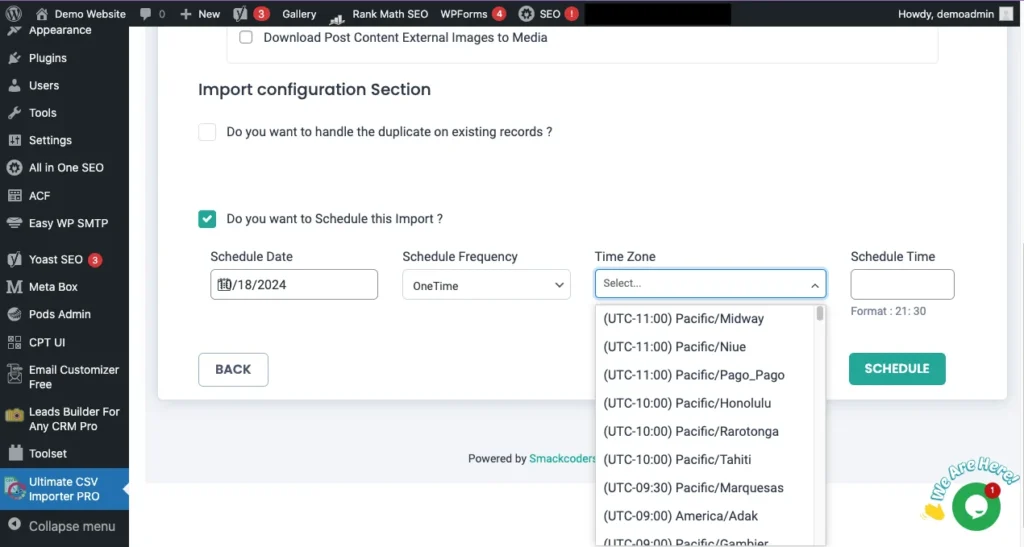
In Step 4, import configuration section, you have an option, “Do you want to schedule import?”. Enable this option, and select the scheduled date, time, frequency, and time zone on which you want to import your WordPress import.
FAQ on Import WordPress Posts #
1. How to import custom post types in WordPress #
To import custom post types,
- Navigate to WP Ultimate CSV importer -> Import/Update.
- Browse the desired file and click on continue.
- Choose the Fresh Import options.
- Then, you need to select the desired custom posts that you need to import.
- All the remaining processes will be the same as that of post imports in WordPress.
WP Ultimate CSV importer supports almost all types of custom posts.
Contact Support if you have any clarifications or need assistance on any new custom post types that are not mentioned on our plugin.
2. How to import pages in WordPress? #
The Import process is the same for all the data types such as Posts, pages, and custom posts. You need to choose Pages from the dropdown on the Fresh import screen and continue the rest of the import process as post-import.
3. How to export posts in WordPress? #
- Go to WP Ultimate CSV importer-> Export
- Choose the data type as Posts. The number of posts on your WordPress site will be displayed.
- Click on Continue.
Map the post fields that you want to export - Configure the export settings by selecting the file name, and file type.
- You can also export your file as Google Sheets by enabling the export data as a Google Sheet option and using an advanced filter to export the post based on any specific condition.
- The advanced filter options include export data with auto delimiters, export data with specific inclusions, export data with a specific status, export data with a specific period, export data with a specific author, export data with specific post ID, export data with specific post title
- Once done, click on Export.
4. How to Migrate WordPress Posts from one site to another? #
The WP Ultimate CSV importer is an all-in-one Import/ Export Plugin that helps in data migration from one site to another with a single plugin.
To Migrate the WordPress Posts,
- Navigate to WP Ultimate CSV importer -> Export
- Select the data types as Posts and proceed with the export process.
- Now all your desired posts will get exported.
- Once exported, navigate to the Import/Update tab
- Browse the exported post file and proceed with the Post Import steps as explained above to complete the migration process.
5. How to Bulk edit WordPress posts? #
Follow the below simple steps to bulk edit your WordPress Posts:
- Export the posts from the WordPress site
- On the exported CSV file( or any other file type) edit the desired changes on the Posts.
- Now Re-import the modified or edited Posts to the WordPress using Import/update option on WP ultimate CSV importer.
- Check and verify whether the changes have been applied to the imported posts.
6. How to perform WordPress Bulk import posts or How do I add bulk posts in WordPress? #
To bulk import posts, prepare an import file with all the posts that you need to import. Then follow all the steps given above to import all the desired posts.

WP Ultimate CSV Importer Pro
Get Ultimate CSV/XML Importer to import data on WordPress faster, quicker and safer.
