Import your CSV/XML records in multiple languages to Posts, Pages, Custom Posts, Taxonomies, Tags, Categories, or WooCommerce Products and export them with WP Ultimate CSV Importer. Fully compatible with Polylang Free, Polylang Pro, and Polylang for WooCommerce Add-on. Adding even more convenience to your multilingual content management.
Supported Modules #
| Posts | Pages | Custom Posts | Tags | Categories | |
| Taxonomies | WooCommerce Products | WooCommerce variation | Media | Woocommerce Order | ACF custom fields(basic,content) |
Step to follow Before import #
Add two additional fields in CSV/XML file #
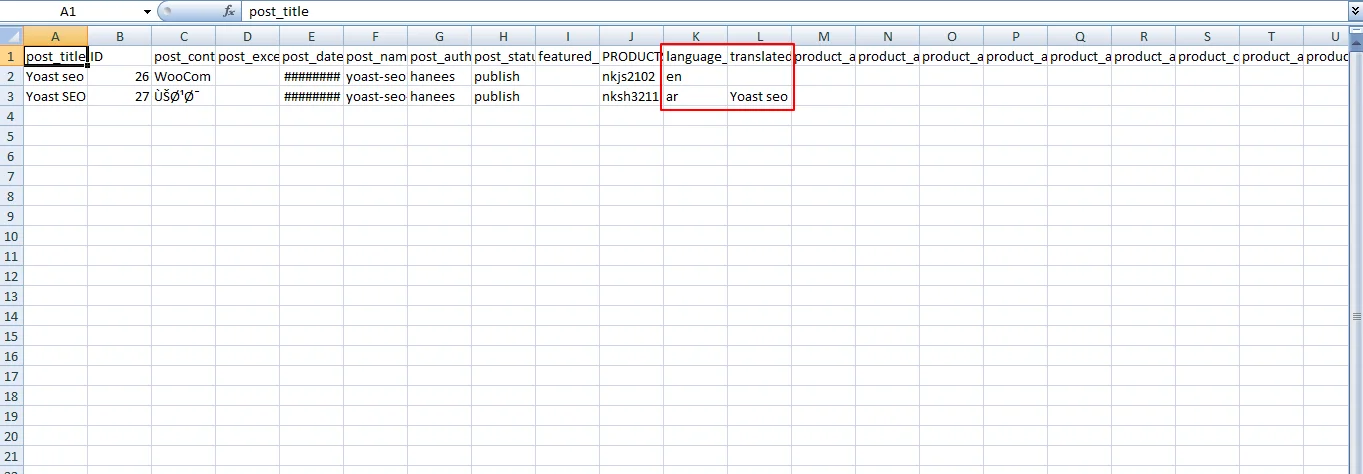
Generate a CSV or XML file containing data for Posts, Pages, Custom Posts, or any other content you wish to import, which incorporates these two additional fields: language_code and translated_post_title.
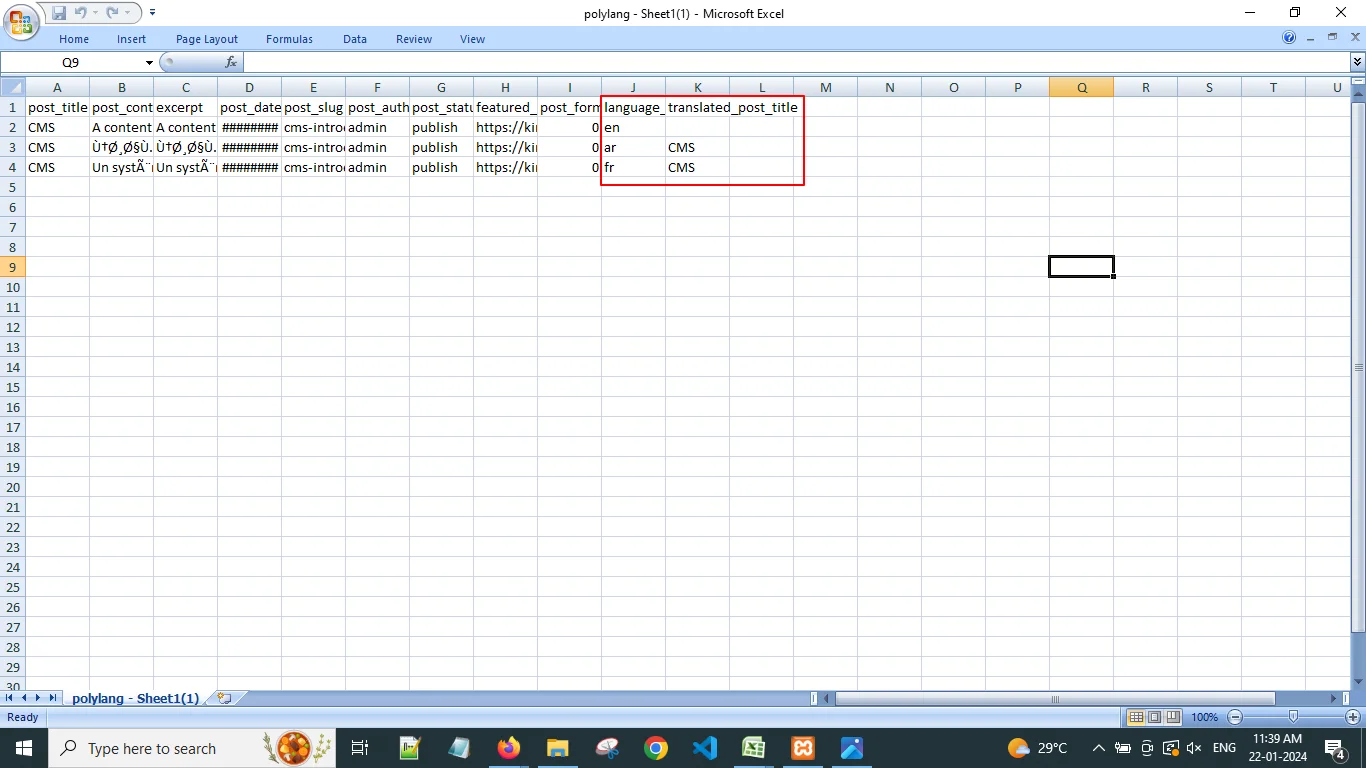
The language_code field holds the language code value for both your default and translated content. The translated_post_title field includes the title value of the original record(the post that you have translated into many languages). Note: You need to mention the value to ‘translated_post_title’ for the posts you wish to translate. This will establish a connection between your translated post and the original/default post.
| CSV Headers | Description | Sample values |
|---|---|---|
| language_code | Provide the language code of the content | ar |
| translated_post_title | Provide default post title value to relate | CMS |
Importing Post content into a multilingual website #
Step 1: First, access the WP CSV Importer plugin by navigating to the left-side menu
Step 2: Click on Import/Update from the top sidebar
Step 3: Browse the CSV that you want to import.
Step 4: Select the content type from the drop-down that you want to import. You can select posts, pages, custom posts, Woocommerce products, Woocommerce variations, media, etc.
Here I select Posts.

Now click on Continue and select Create Mapping to map your posts csv or import file fields.
Types of Mapping
The fields in the uploaded CSV have been auto-mapped. You can also map the custom field that you have added to the CSV for importing
You can map your post-WP fields with their related CSV header in two different methods. The WP CSV importer plugin uses auto mapping when your csv fields are the same as that of WP fields. If you provide a different name in CSV then you need to manually map the field.
Advanced Mode:
Map the fields of CSV header using the drop-down corresponding to its related WP fields.
Drag and Drop Method:
Drag the appropriate CSV header from the right side menu and drop it on its related WP fields.
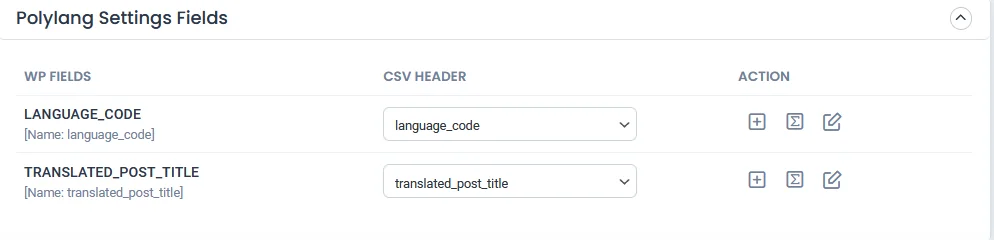
Polylang Settings field
Ensure the language_code and translated_post_title are mapped correctly.
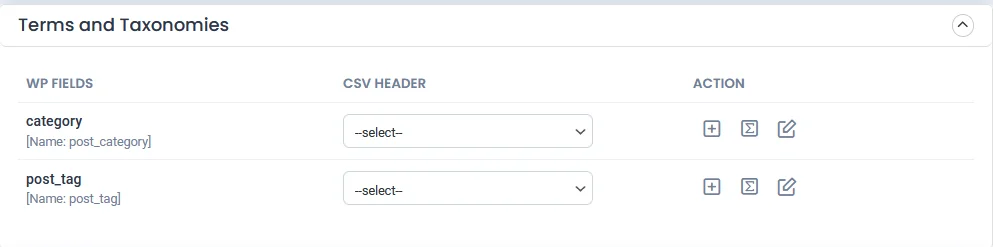
Terms and taxonomies:
If you want to import the post category, map the category field here. For this, you must also include the post category field in your CSV file.
Also, to import post_tag, add the post_tag field in your CSV file and simply map this post_tag field.
Create WP custom fields:
You can also add custom fields newly here to map the custom fields you’ve mentioned in your import file of your post by clicking on this Add custom field button.
Once done, save the mapping template with the unique name.
Now click on Continue.
Import Configuration
Choose the desired option from manage image uploads.
Enable /Disable the below configuration based on your business needs.
- Enable safe prestate Rollback (Backup before import)
- Do you want to SWITCH ON Maintenance mode while import?
- Do you want to handle the duplicate on existing records?
- Do you want to Schedule this Import?
If scheduling, provide the scheduled date, time, frequency, and time zone. Then click the Schedule button.
If not, just click the Import.
Verify and Review: #
Once, the import is finished, you’ll receive the import completed message where you can download the import logs. If any images failed to import, click and download the failed media list to identify the failed images.
Close the window, to see the detailed logs for each imported records.

You can see the detailed view of the posts that have been imported.
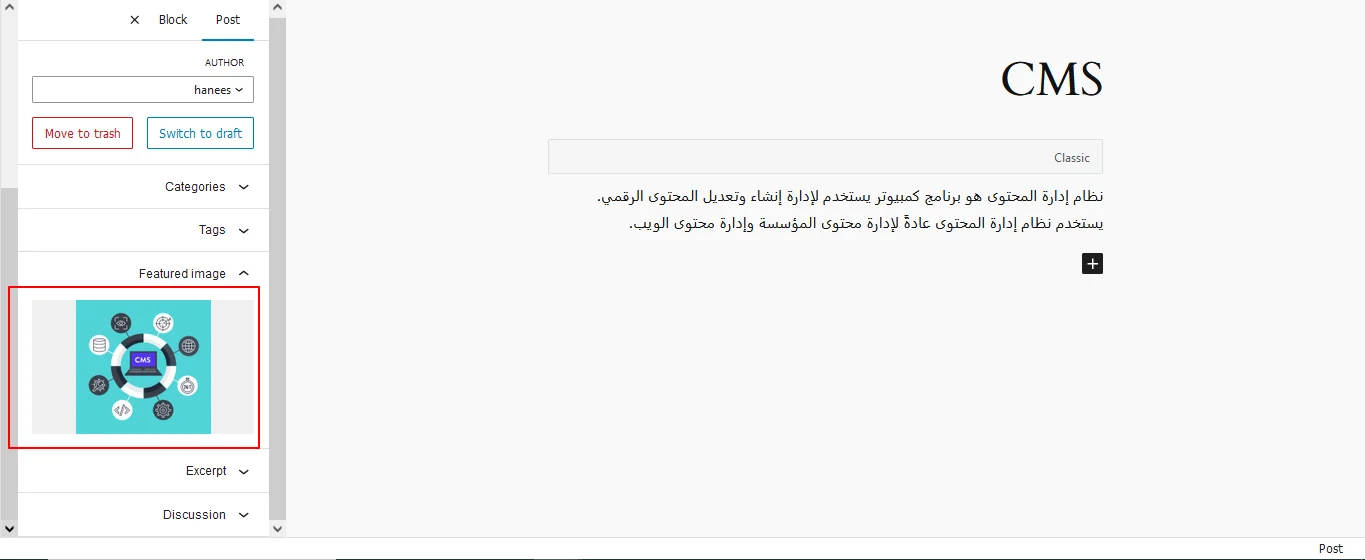
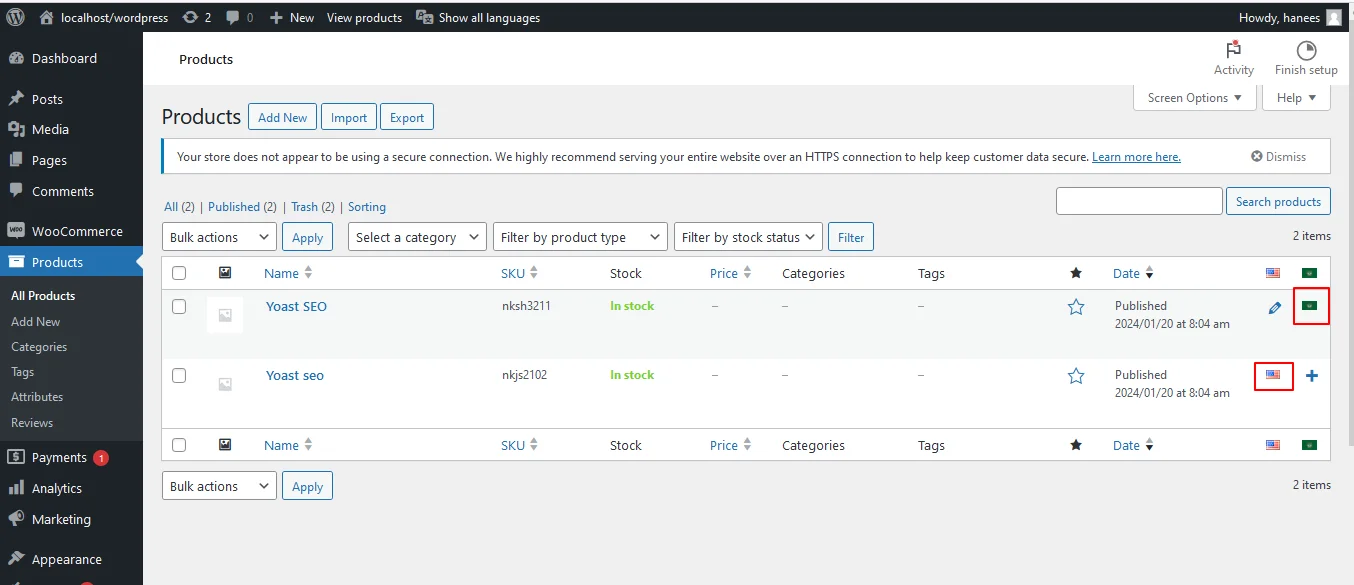
Or you can verify and confirm your Post Import by navigating to Post->All posts
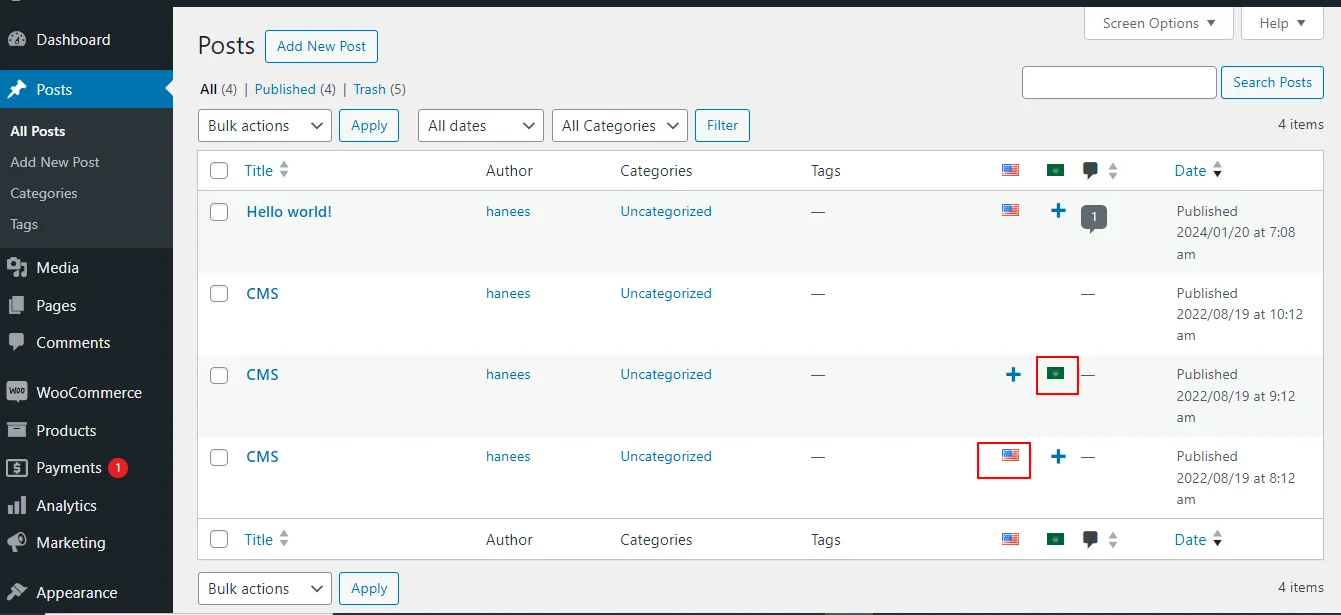
Here you can see, that two posts get imported with the same post title and in different languages.
- For more information on importing content, refer to the how-to import into WordPress documentation.
Importing categories and Post tags in Multi-language #
With CSV importer you can import your categories and post_tas along with the post. However, you can also import the translated content of your post categories and post tags even after importing the posts.
Make sure you have already imported the related post for which you need to import the post categories and post tags.
While importing, select the Import each record as “categories” from the drop-down
Importing Woocommerce Products in Multilingual Websites
The importing process of Polylang Woocommerce includes the same step as explained in how to import post content in the above section.
- First, prepare a csv with the original product and translated product
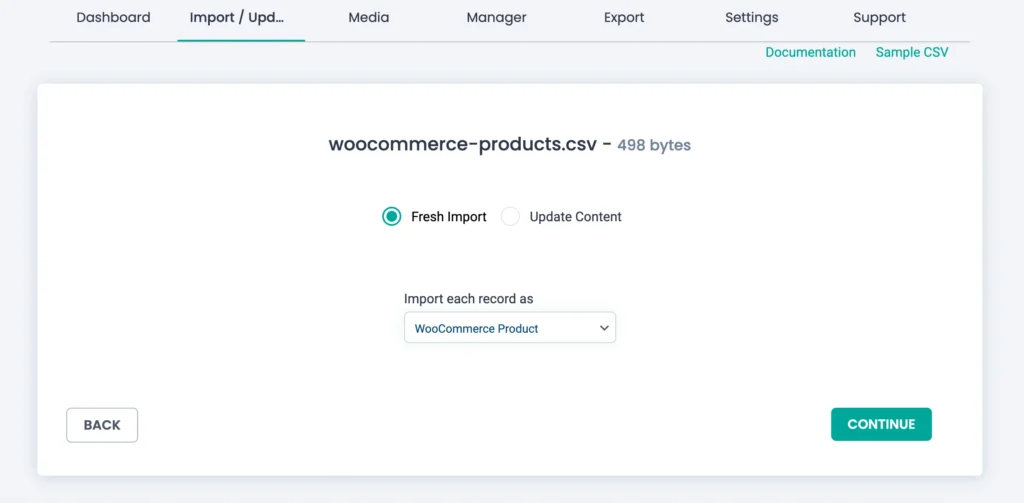
- Navigate to the CSV importer->Import/update-> Browse the desired csv file
- Select the product type as Woocommerce Products
- The fields on the uploaded csv are auto-mapped. You can also add mapping to any custom fields that you can additionally create on the csv.
- Configure the Import configuration steps as per your needs
- Once done click on Import.
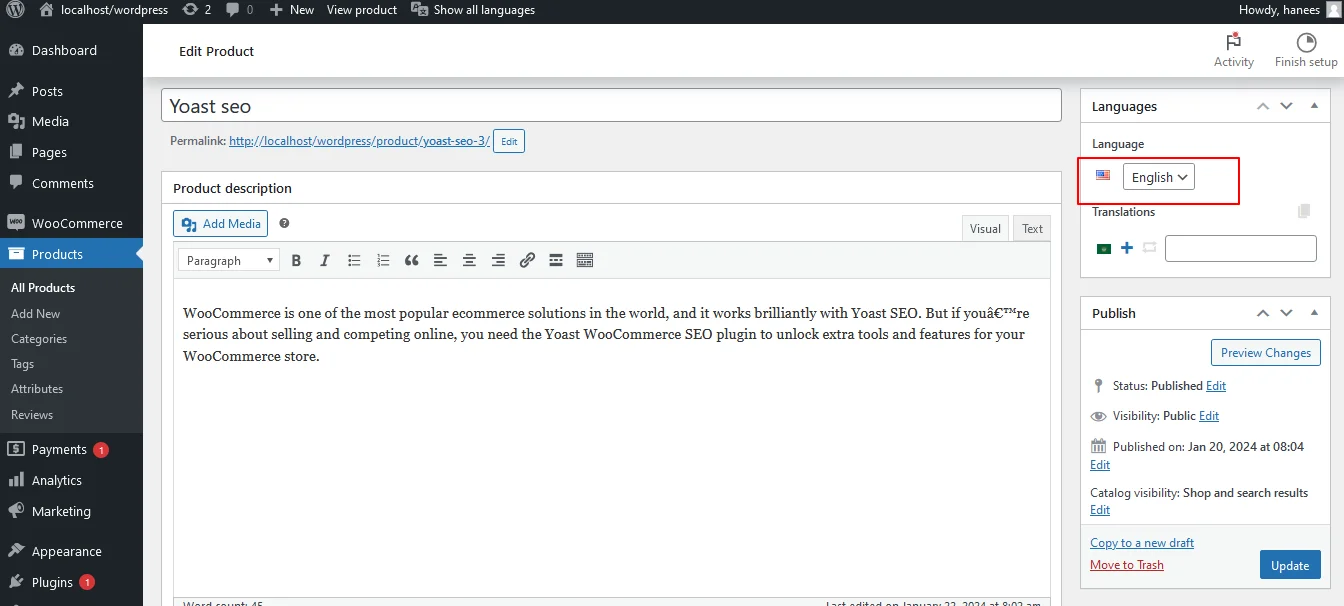
- Now your Woocommerce products have been imported with its translated content.
Detailed view:
List view:
Import Woocommerce variations
Importing WooCommerce products will also import the Woocommerce variations. However, you have an option to import your Woocommerce variation alone.
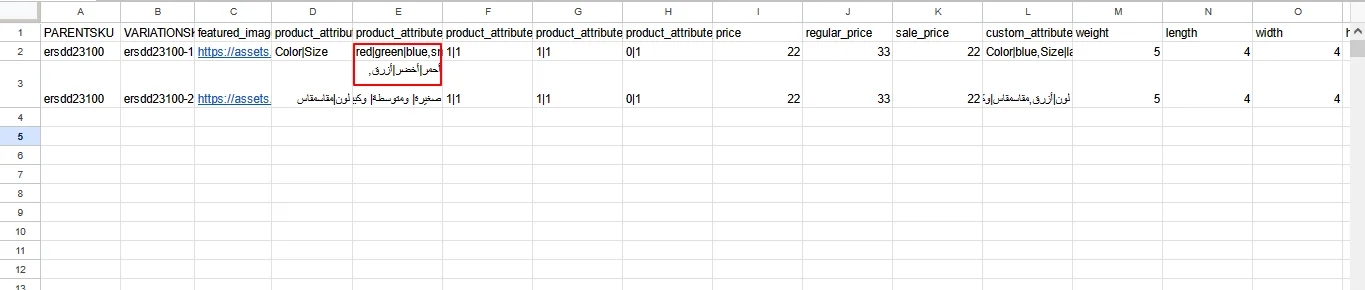
Prepare your csv with your Woocommerce variation and its translated content. While preparing CSV for Woocommerce variations, note that you have translated your Product attributes for multiple values and separated them with the pipeline (|) as it is in the original content.
Then import your csv with the WP CSV importer by the Importing steps explained above.
While importing, make sure you have selected the post type as Woocommerce Variations, map your fields, and Import.
With this, you can easily import the Woocommerce Variations for your existing Products.
Import Woocommerce Orders
To import WooCommerce orders, Prepare a csv for your Woocommerce orders with its translated content.
To know how to prepare a csv, refer this article
Once you prepared your CSV follow all the Importing steps of WP CSV importer plugin.
Makesure to select your Woocommerce orders as your content post type. Once done map your fields, configure import settings, and Import.
Note: Before importing Woocommerce orders, make sure your product corresponding to the respective orders will have already been imported in your WordPress site.
Import Images in your Multilingual Website.
With WP CSV importer, it is easy to import images alone. Before importing images first you need to zip the images or the image folder that you need to import.
While preparing csv you need to add the zip folder name (with extension) in the Image field. If you zipped the folder that contains your images, then you need to enter the foldername/image name. For example, pictures/WPexporter.
The pictures folder is zipped, where I need to import the WP exporter image.
Once done, start the import process of the WP CSV importer. Visit the media tab in the CSV Importer plugin. Select the Device option.
Browse your zip file first. It’ll ask you to choose the images from zip to import. If you want to import all images then tick the checkbox beside the text ‘name’. Click OK.
Next upload the prepared CSV for images. Make sure the file includes fields like filename, title, caption, description, and alt text. Choose ‘Fresh Import’ as we’re importing images newly.
Continue mapping your desired fields. The fields will be automapped if the import file headers and WordPress media fields are the same.
And save the mapping template. Fill in the import configuration steps and click on Import.
Now your images have been imported on your media library.
Export content from a multilingual site #
With WP CSV importer, you can import as well as export translation content from the Polylang multilingual website. You can export multilingual content of posts, pages, custom posts, or other post types, WooCommerce products, Woocommerce variations, etc from your website.
- Move to the Export tab in the plugin.
- Select the desired post type or module to export their data.
- If choosing Custom Posts, select one custom post from the dropdown to export its data.
- Click Continue.
- Provide a name for the file to export.
- Select the file type for export such as CSV, XML, XLS, or JSON.
- Click Export to instantly export the data or enable the ‘Do you want to schedule this export?’ option and provide the scheduled date, frequency, time zone, and time if scheduling.
- Click Export> Download. The downloaded file will be saved to your computer’s desktop.
Updating translated records data with the CSV Importer plugin #
To update the existing translated records data, follow these steps:
- Upload the updated CSV or XML file.
- Choose Update content and select the post type.
- Click Continue.
- Select the “Use template” button to use the previously saved mapping template, or click “Create new mapping” to map the CSV header fields with WP fields.
- Click Continue.
- Configure manage media uploads section to control duplicates.
- In the import configuration section, enable the ‘Do you want to handle the duplicate on existing records ?’ and select a field to handle duplicates. Available fields include post_title, ID, and post_name.
- Click Update to promptly update the data on your website.
- If desired, you can schedule the update process by enabling the “Do you want to Schedule this Import?” and providing the schedule details.
- Once you have filled in the details, click Schedule Update.
Frequently Asked Questions #
1. Which Polylang Add-on is supported by the CSV Importer plugin?
The plugin supports the Polylang for WooCommerce Add-on.
2. What WooCommerce data can be imported by CSV Importer for Polylang?
The CSV Importer imports WooCommerce products with their taxonomies, WooCommerce orders, and Woocommerce Variations
3. Does the plugin automatically translate the content?
No, it doesn’t. WP Ultimate CSV Importer only imports and exports multilingual content. You should add the translated content in CSV or XML and then you can import it with our plugin.
4. How to use the spreadsheet for each language?
It is easy to include all the translated content in a single CSV or single spreadsheet. You can easily differentiate each language by adding an extra column to the CSV such as language code. Provide the language code (en for English, ar for Arabic, fr for French) corresponding to its translated content.
5. How to prepare the translations in a CSV file?
Step 1: Translate the original content to your desired languages.
Step 2: Open the Google spreadsheet
Step 3: Enter your post content title and its translations in the rows and provide all the post content details in the column.
Step 4: Add two extra columns for the language code and the translated post title.
Step 5: Enter the desired language code corresponding to the translated post content. That is provide the language code “en” corresponding to the English post. And provide the language code “fr” corresponding to the French post.
Step 6: Enter the post title of the original content in the translated post title column of all the translated content. Leave the translated post title column of the original content empty.
Step 7: Once done, Save the file in .CSV format.
6. How to import the Polylang translations quickly?
With WP CSV importer, it is easy to import the polylang translation quickly. The import steps are explained above in this documentation.
WP Ultimate CSV Importer Pro
Get Ultimate CSV/XML Importer to import data on WordPress faster, quicker and safer.