WP Ultimate CSV Importer offers a powerful solution to import, update, schedule, and export data for LearnPress, making managing your courses, lessons, quizzes, questions, and orders easier. This guide will walk you through importing LearnPress data using the WP Ultimate CSV Importer plugin.
Preparing the CSV File for Import #
Before importing, you need to prepare a CSV file that contains all the LearnPress data you want to import. Below are the key fields and their expected format for each LearnPress item (Courses, Lessons, Quizzes, Questions, Orders). For Multiple lessons or courses, use a pipeline separator. To import multiple lessons for a single curriculum, use a comma separator.
LearnPress Fields to Import #
Courses
- Duration: The time duration of the course (e.g., “10 minutes”, “1 hour”, “3 days”).
- Maximum Students: Max number of students for the course (e.g., “100”).
- Price: The regular price of the course (e.g., “300”).
- Sale Price: The discounted price of the course (e.g., “200”).
- Author: The WordPress user who created the course (e.g., “Admin”).
- Featured List: Whether the course is featured (e.g., “yes”).
- Passing Condition Value: The passing percentage or score (e.g., “50”).
Download our sample CSV for LearnPress Courses and test import on your trial instance.
Lessons
- Lesson Name: The name of the lesson (e.g., “Zoom Class 1”).
- Lesson Duration: Duration of the lesson (e.g., “1 hour”, “2 days”).
- Curriculum Name: The curriculum this lesson belongs to (e.g., “WordPress Data Import”).
- Preview Lesson: Whether the lesson can be previewed before enrolling (e.g., “yes”).
Download our sample CSV for LearnPress Lessons.
Quizzes
- Quiz Name: Name of the quiz (e.g., “Smarticus”).
- Passing Grade: The passing grade for the quiz (e.g., “70”).
- Re-Take: Number of times a student can retake the quiz (e.g., “2”).
- Quiz Duration: Duration of the quiz (e.g., “30 minutes”).
Download the LearnPress Quizzes sample CSV.
Questions
- Question Title: Title of the question (e.g., “What is WordPress?”).
- Question Type: Type of question (e.g., “single_choice”, “multi_choice”).
- Question Options: Multiple answer options (e.g., “One|yes->Two|no”).
- Answer Explanation: Explanation for the correct answer (e.g., “WordPress is an open-source CMS”).
Download the LearnPress Questions sample CSV.
Import Process Using WP Ultimate CSV Importer #
Once your CSV file is prepared, you can begin importing your LearnPress data into WordPress. Follow the steps below to ensure a smooth import process.
Step 1: Navigate to WP Ultimate CSV Importer #
- Go to the WP Ultimate CSV Importer section in your WordPress dashboard.
- Click on Import/Update to begin the import process.
Step 2: Select the CSV File to Import #
- Click on the Browse button to select the CSV file you have prepared for LearnPress data.
- Select the file containing your Courses, Lessons, Quizzes, Questions, or Orders.
- Once the file is selected, click on Next to proceed.
Step 3: Choose the Post Type (Courses, Lessons, Quizzes, etc.) #
- From the Post Type dropdown, select the content type you’re importing (e.g., Courses, Lessons, Quizzes, Questions, or Orders).
- You can choose to import new records or update existing records.
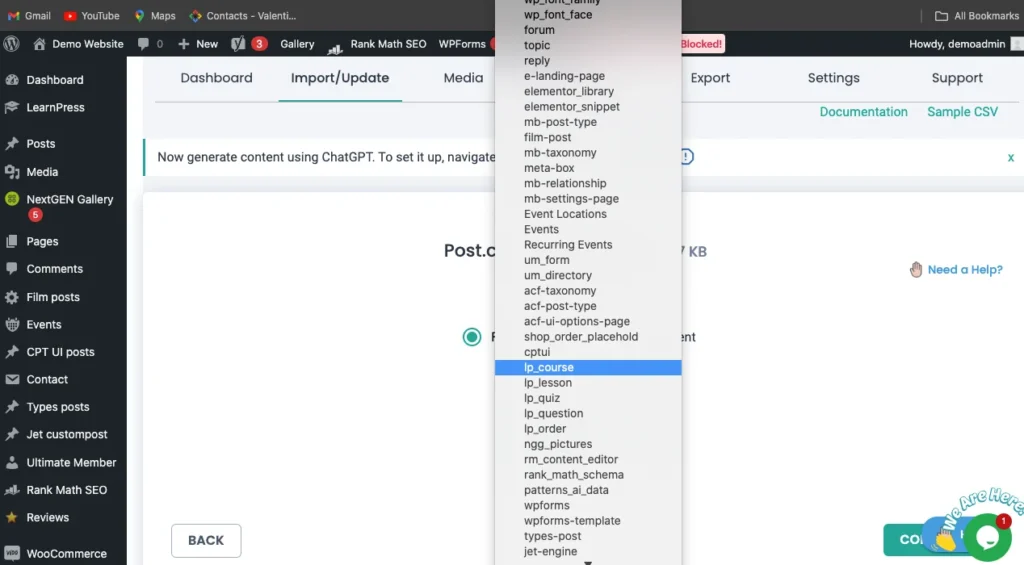
Step 4: Map the CSV Columns to LearnPress Fields #
- WP Ultimate CSV Importer will automatically map the columns in your CSV to the corresponding LearnPress fields.
- Review the mappings to ensure that the columns match the correct fields (e.g., the Course Name column in your CSV should map to the Course Name field in LearnPress).
- You can map the WordPress core fields with the CSV fields by a simple drag-and-drop method or by choosing fields by drop-down.
- If any mappings are incorrect or missing, you can manually map the fields to the appropriate LearnPress fields.
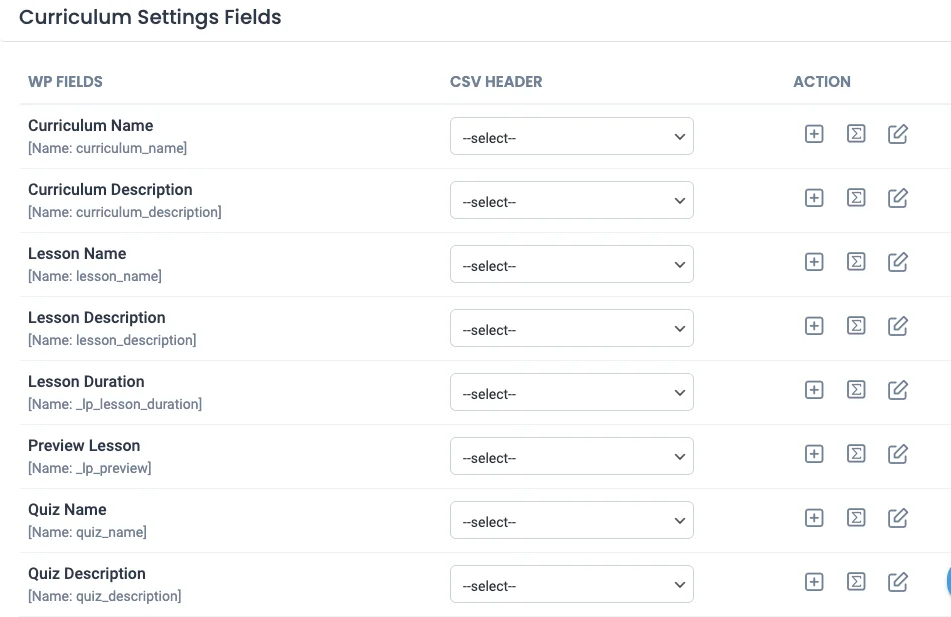
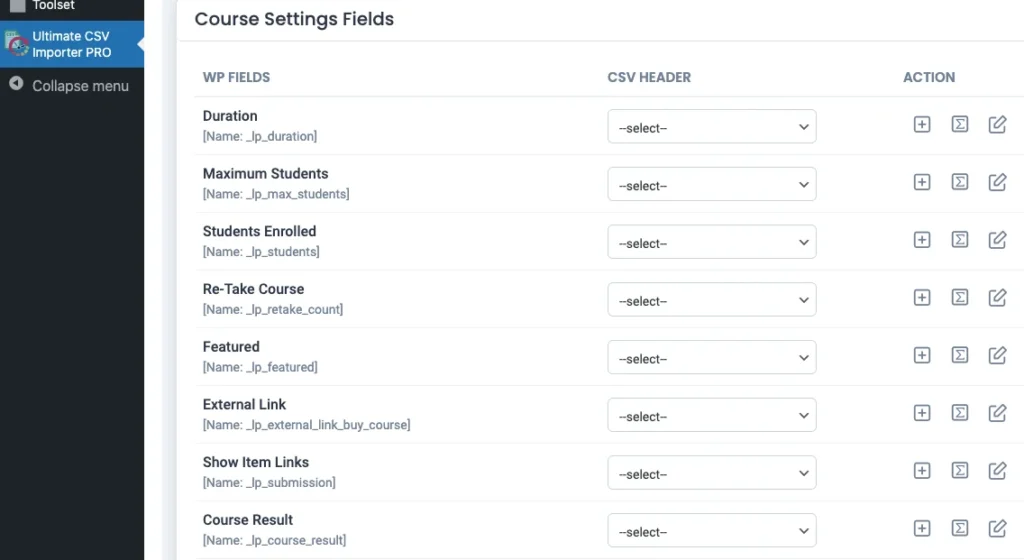
5. Click on Next once you’ve confirmed the mappings are correct.
Step 5: Configure Import Settings #
- You can choose additional import settings, such as:
- Import New Records Only: If you only want to import new courses or lessons and avoid duplicates.
- Existing Items Option: If you are updating existing records, check the box to enable Update existing records based on fields. This ensures that the plugin will update the data based on the fields you selected, rather than creating duplicates.
- Schedule Imports: You can also schedule the import to run automatically at specific intervals (for example, daily, weekly, or monthly).
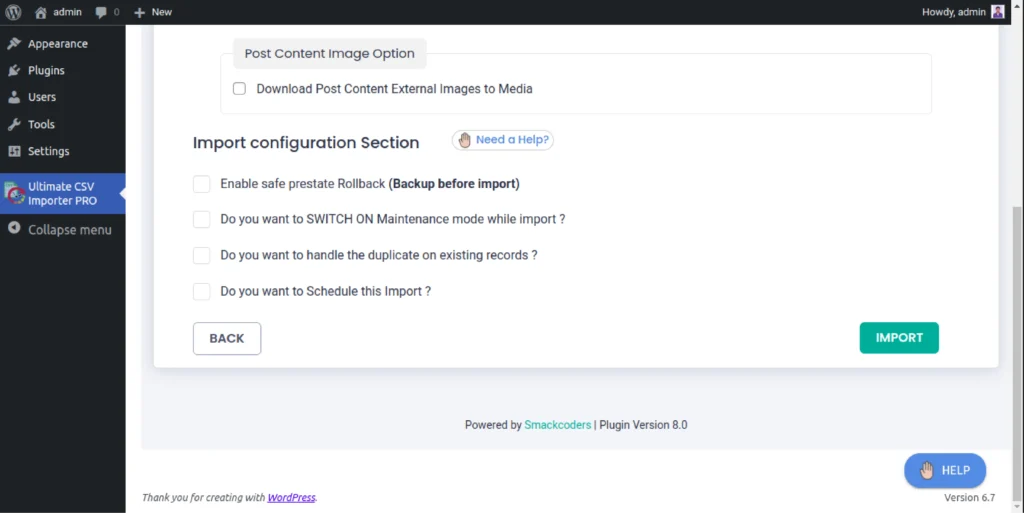
Step 6: Start the Import #
- Once you have selected all the import settings, click on Start Import to begin the import process.
- The plugin will process your CSV file and start importing the data into LearnPress.
- After the import is complete, you will see a success message with the number of records imported.

WP Ultimate CSV Importer Pro
Get Ultimate CSV/XML Importer to import data on WordPress faster, quicker and safer.
Update LearnPress Data #
WP Ultimate CSV Importer allows you to update existing LearnPress records. To update your LearnPress data:
- Upload your CSV file as you would during a normal import. Choose the import type as existing content.
- During the import process, enable the Update records based on fields option.
- This ensures that existing LearnPress content is updated with the new data, such as changes to course prices, durations, or lesson details.
Export LearnPress Data #
You can also export your LearnPress data, including Courses, Lessons, Quizzes, Questions, and Orders, using WP Ultimate CSV Importer. To export data:
- Go to the Export tab in WP Ultimate CSV Importer.
- Select Custom Posts (e.g., Courses, Lessons, Quizzes).
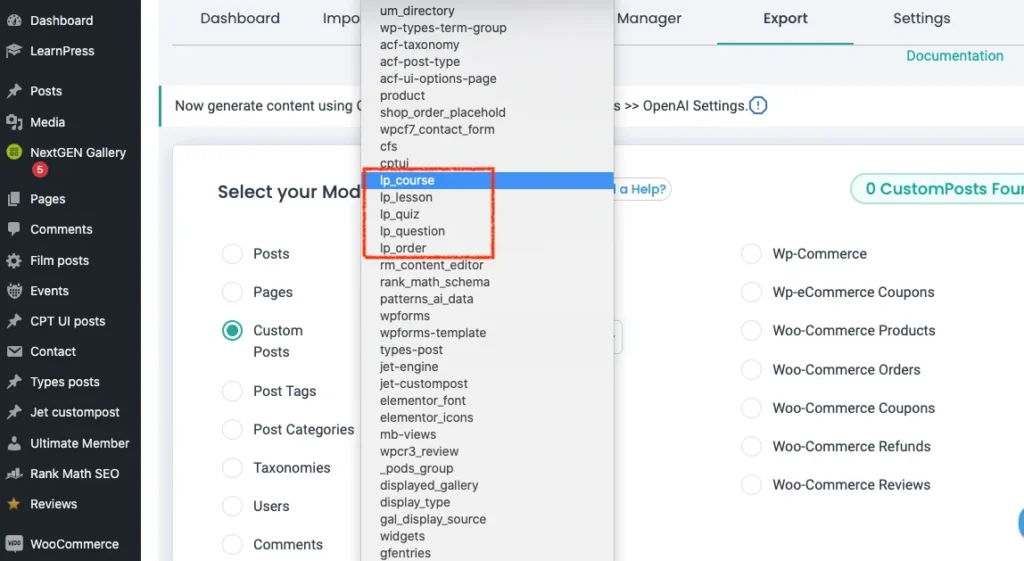
3. Name the export file and choose the file format (CSV or XML).
4. Configure advanced filters (optional) to refine the data you want to export. To learn more about the advanced filters, refer to the exporter guide.
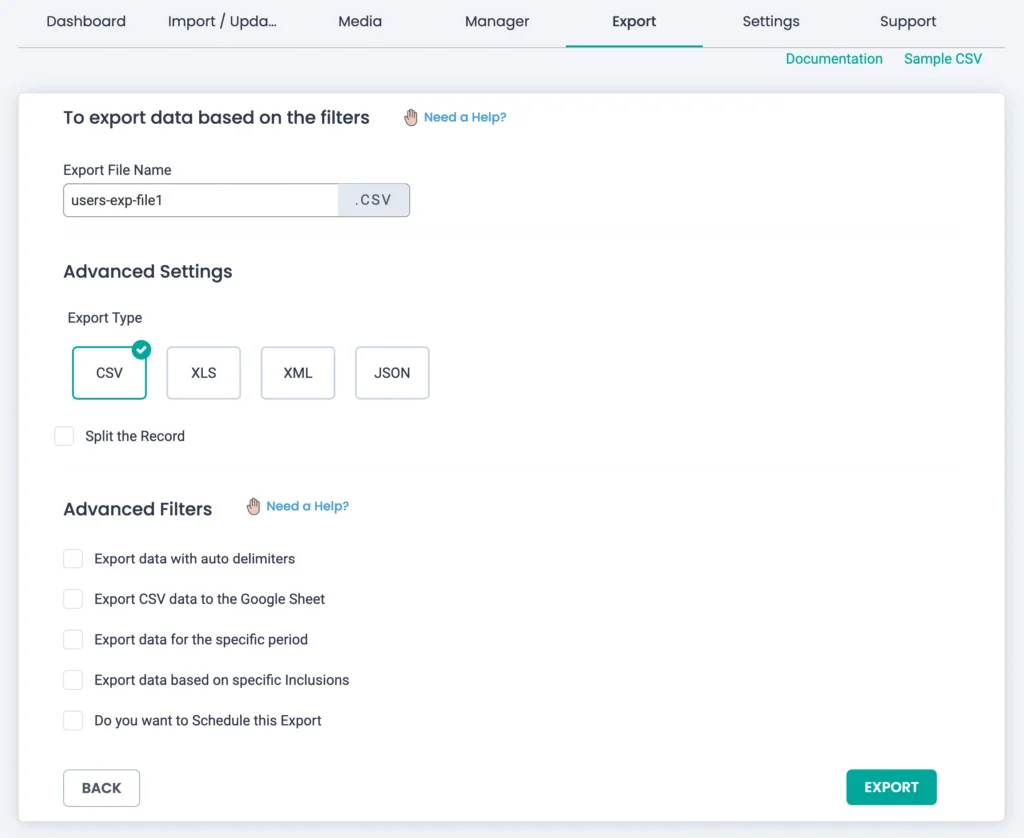
5. Click Export, and once the export is complete, click Download to save the file to your computer.

WP Ultimate CSV Importer Pro
Get Ultimate CSV/XML Importer to import data on WordPress faster, quicker and safer.


