You can import and export WordPress data to Excel (.xlsx) files with WP Ultimate CSV Importer, making data management more efficient. This guide will walk you through the step-by-step process of importing and exporting WordPress data using Excel.
Before proceeding, ensure the following:
- WP Ultimate CSV Importer is installed and activated.
- Your server allows file uploads of sufficient size. Check PHP settings (upload_max_filesize) and verify system values in Settings > Security and Performance. If the minimum values are not met, increase them in your php.ini file.
- Your Excel file is formatted correctly (see Step 1 below).
Import WordPress Data from Excel #
Step 1: Prepare Your Excel File #
Ensure your Excel file is properly formatted:
The first row should contain column headers (e.g., post_title, post_content, etc.,).
Data should be structured consistently across rows.
Save the file in .xlsx format.
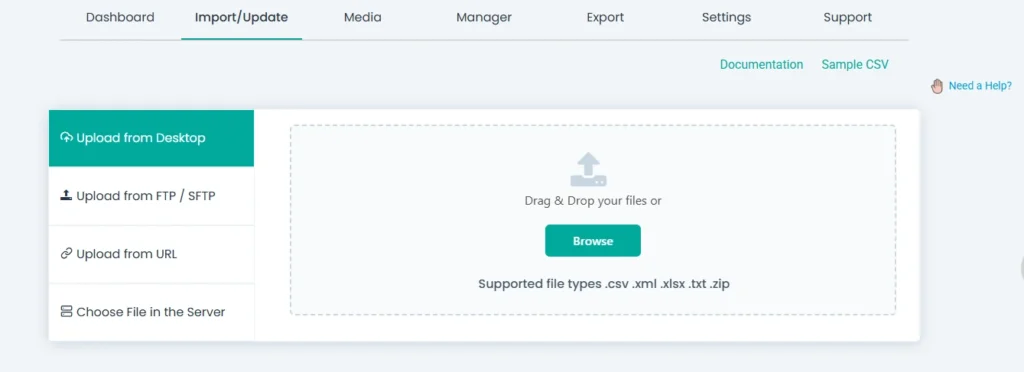
Step 2: Upload the Excel File #
Navigate to WP Ultimate CSV Importer in your WordPress dashboard.
In the Import/Update tab, choose any file upload option and upload the excel file.
Once loaded, the next page will load automatically.
Step 3: Select Post and Import Type #
Choose the type of data you want to import from the dropdown, such as Posts, Pages, Users, WooCommerce Products, or any Custom Post Types. Select either ‘Fresh Import’ to add new entries or ‘Update Content’ to update existing data.

Click Continue.
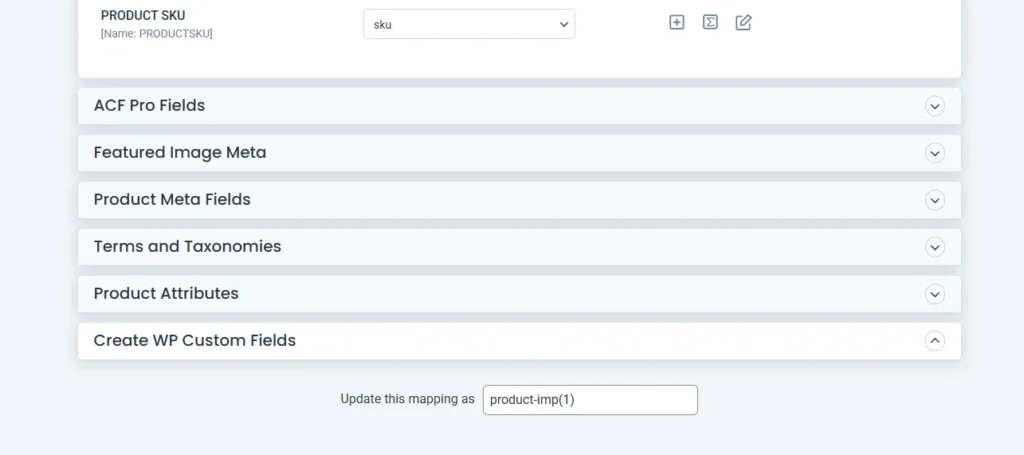
Step 4: Map Excel Fields to WordPress Fields #
The plugin automatically detects matching columns. If any fields are unmatched, map them manually using the dropdown or drag-and-drop method.
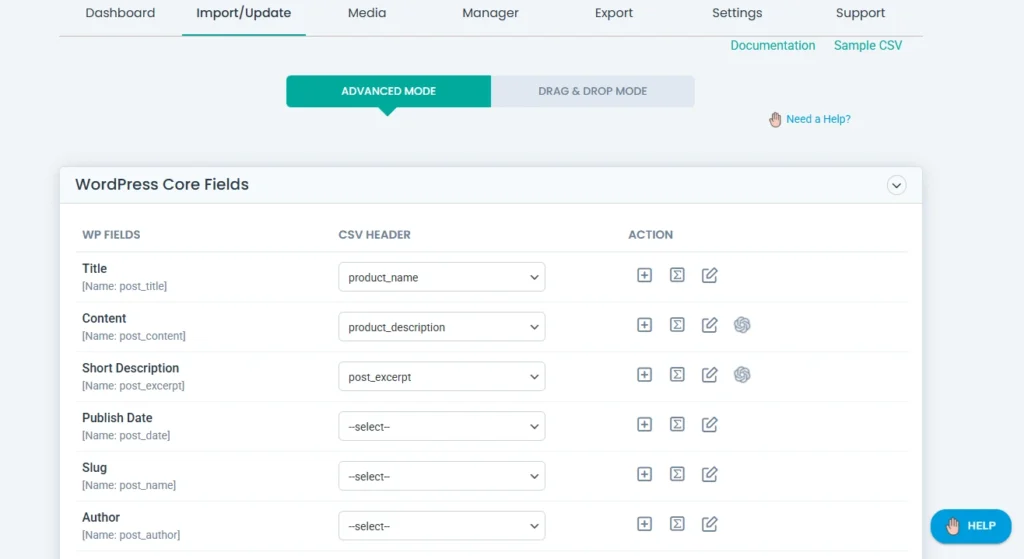
Save your mapping configuration with a name at the bottom of the page for future imports.
Click Continue to proceed.

WP Ultimate CSV Importer Pro
Get Ultimate CSV/XML Importer to import data on WordPress faster, quicker and safer.
Step 5: Configure Import Settings & Run the Import #
Configure media upload settings: import as new images, overwrite existing image, or use existing images if already available.
Adjust additional settings, such as rollback options, duplicate handling, and maintenance mode.
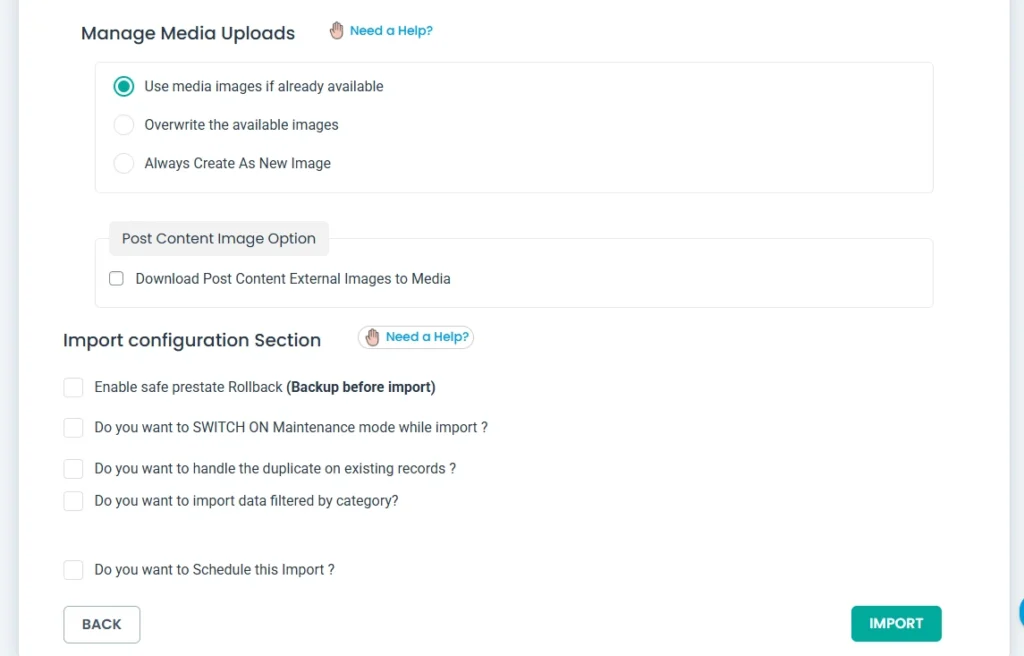
Click Import to start processing the file. Monitor progress in the import log.
Once completed, check your WordPress site to confirm the imported data.
Export WordPress Data to Excel #
Step 1: Navigate to the Export Section #
Go to WP Ultimate CSV Importer in your WordPress dashboard.
Click Export.
Step 2: Choose Data Type #
Select the data type you want to export (e.g., Posts, Pages, Products, Users, etc.).
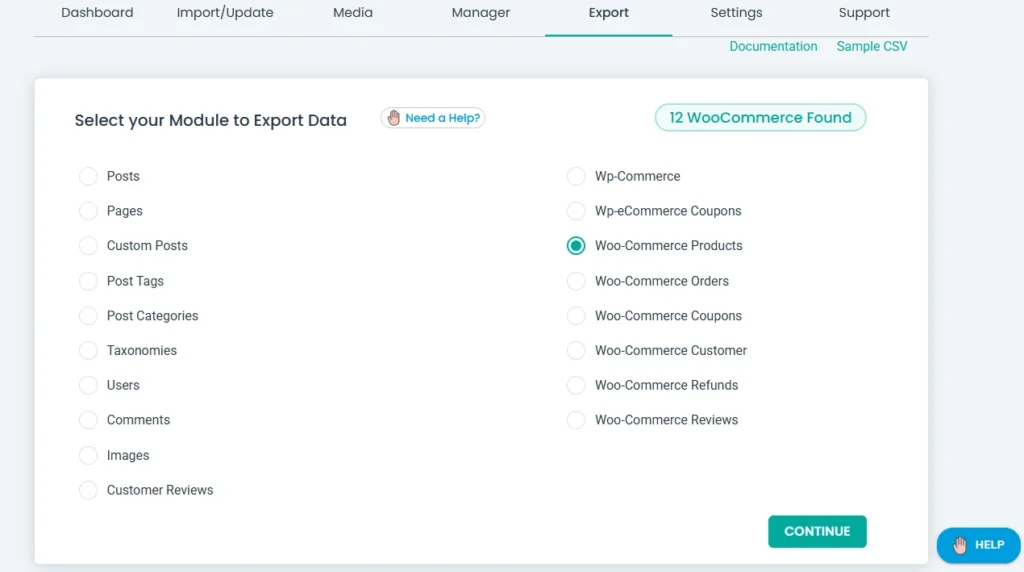
Click Continue.
Step 3: Select File Format & Apply Filters #
Enter a name for the exported file. Choose Excel (.xlsx) as the export format.
Apply filters if needed, such as date range, categories, specific post titles/statuses/ids/authors, etc.,
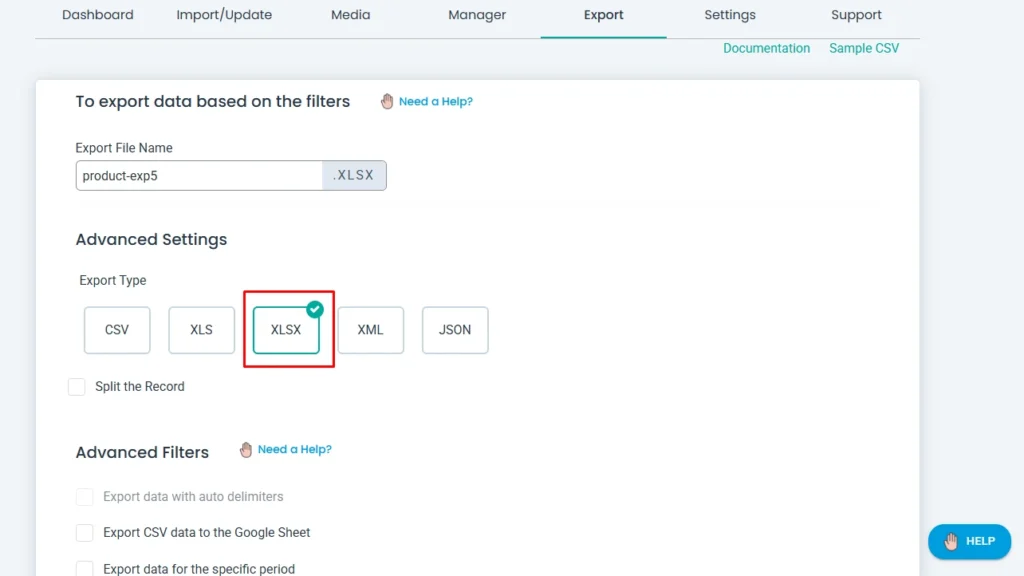
Click Export.
Step 4: Download the File #
Once the export process completes, download the generated Excel file.
Open it to review the exported WordPress data.
WP Ultimate CSV Importer Pro
Get Ultimate CSV/XML Importer to import data on WordPress faster, quicker and safer.