Introduction #
Customer reviews are crucial for building trust and improving conversions in any WooCommerce store. To import WooCommerce Reviews, navigate to the WP Ultimate CSV importer > Import/Update. Browse your import file, and select the file type as WooCommerce Reviews from the drop-down. Map the incoming CSV fields with the WP core fields. This simplifies the process of managing reviews effectively. Now let’s see the Import/Export steps in detail.
Steps to Import WooCommerce Reviews #
Step 1: Create the Import File for WooCommerce Reviews #
- First, prepare the import file with the WooCommerce reviews that you need to import. Download our sample csv file here.
- Ensure you have installed and activated the WooCommerce Reviews plugins and WP ultimate CSV importer Pro plugin.
- Navigate to the WP Ultimate CSV importer Pro and select Import/Update.
- Click on Browse to upload the import file. Select the data type as WooCommerce Reviews from the drop-down.
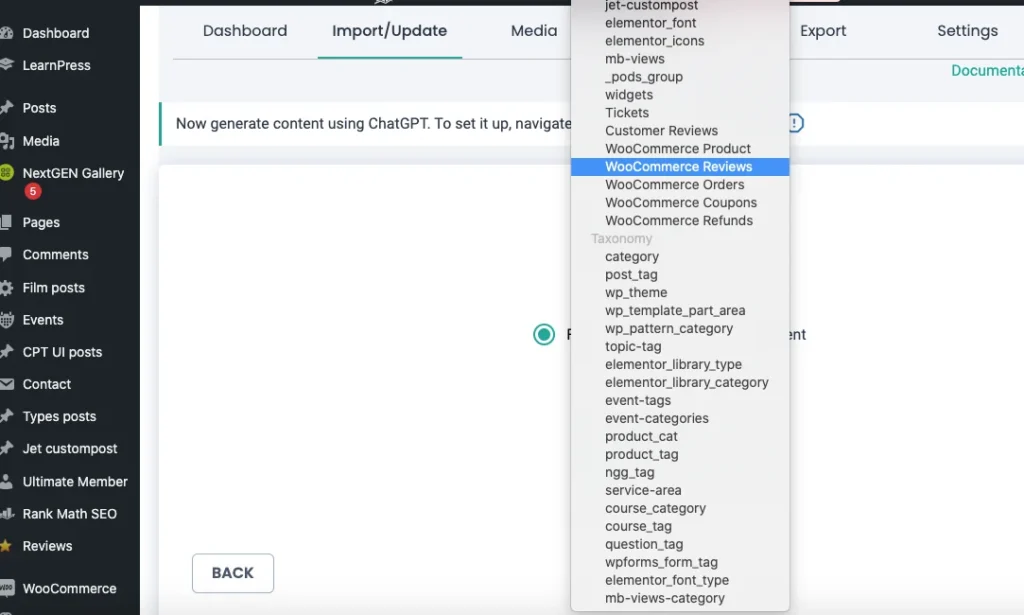
- Choose the import type “Fresh Import” for new data import and Select “Update content” to update your existing records.
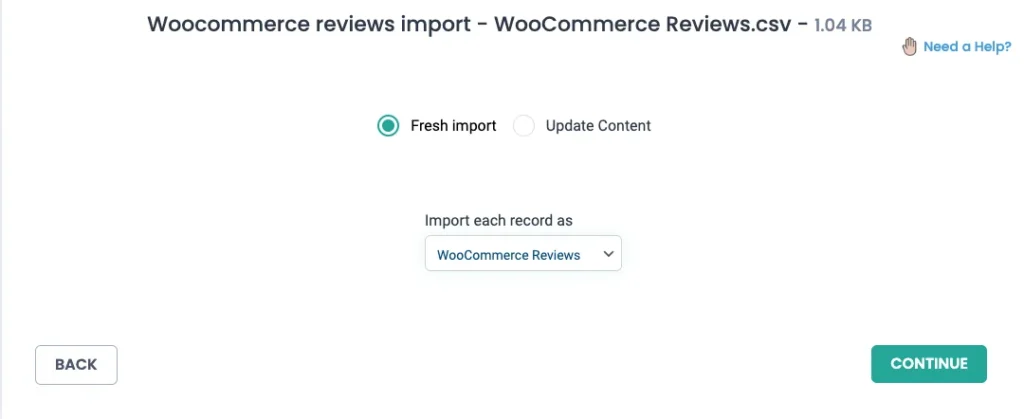
- Now click on Continue.
Step 2: Map CSV Fields to WooCommerce Review Fields #
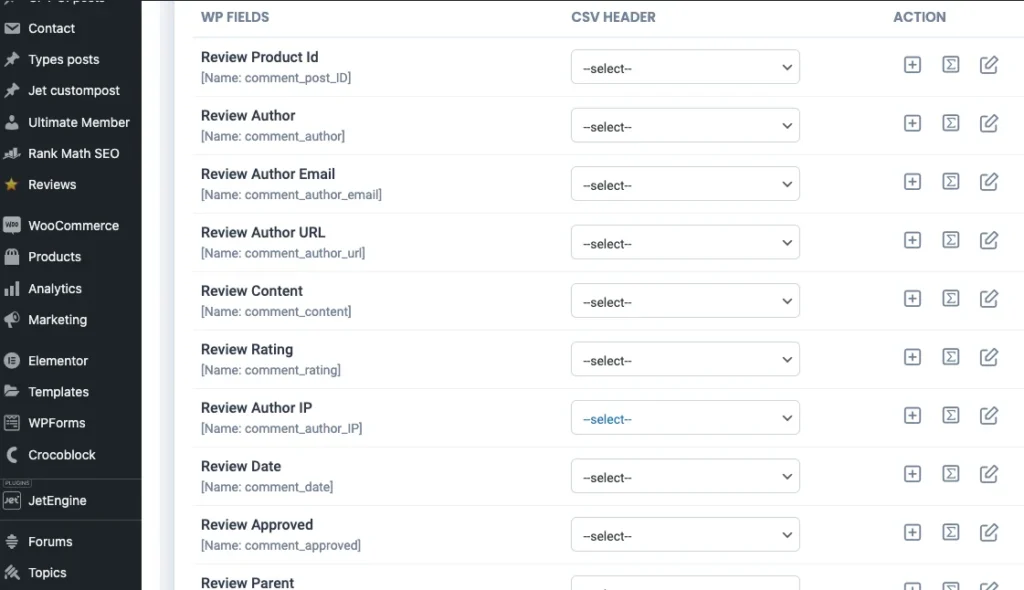
- The plugin will display a field mapping interface.
- You can choose the advanced mode for drop-down mapping. Or you can choose an advanced mode for drag-and-drop mapping.
- Map the columns in your CSV file to the appropriate WooCommerce review fields (e.g., map review_author to the Reviewer Name field).
- Save your mapping template for future imports if needed.
- Click on Continue.
Step 3: Configure the Import Settings #
- Enable the Safe prestate Rollback option to backup your data before import
- You can also enable the Maintenance mode based on the import needs.
- For effective handling of duplicates on existing records, you can enable the option “Do you want to handle the duplicates on existing records”
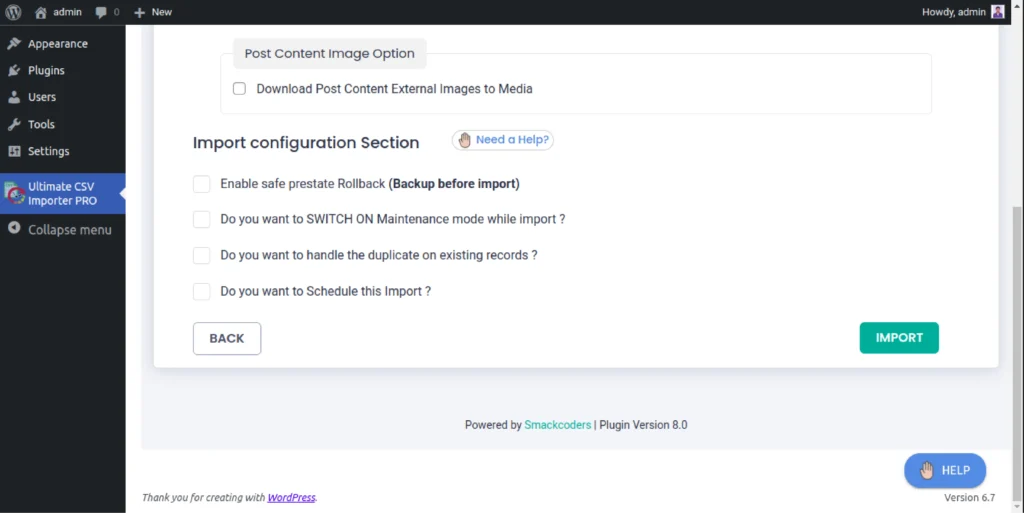
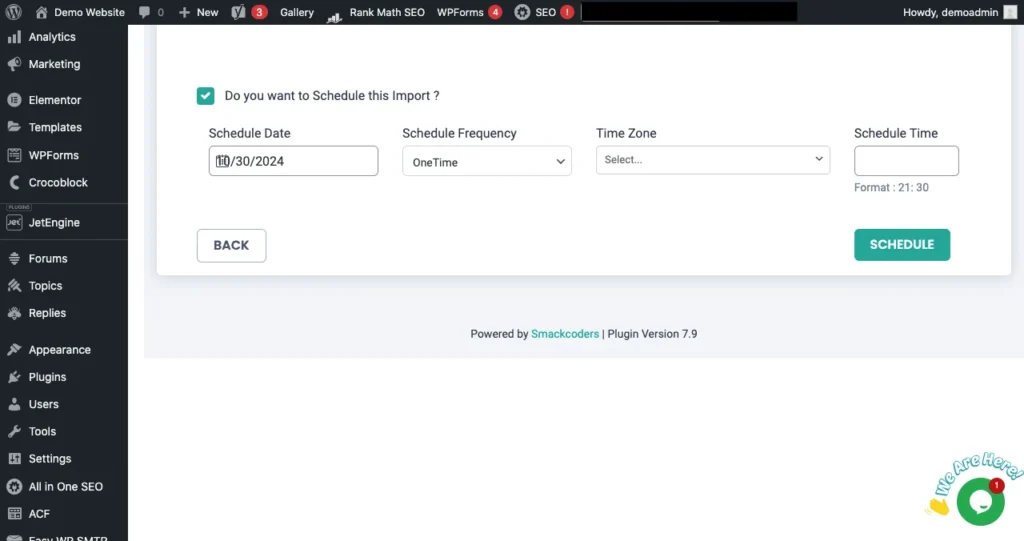
4. To schedule your data import, enable the “Do you want to schedule Import”.
5. Enter the Schedule date, time, frequency, and time zone. Then click on Schedule Import.
6. Once done with the configuration settings, Click Import Now to begin the process.
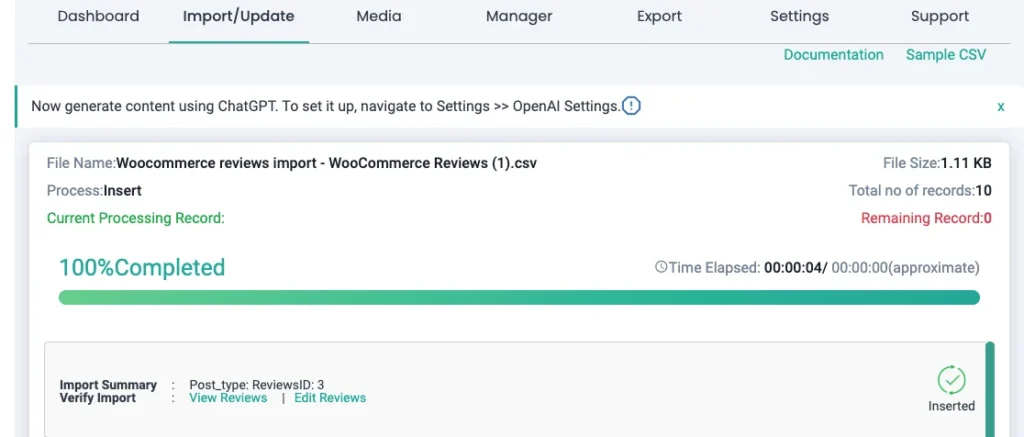
7. Monitor the progress bar to ensure the import is completed successfully.
Step 4: Verify Imported Reviews #
- Navigate to WooCommerce > Reviews to verify the imported reviews.
- Confirm that the reviews are correctly linked to the respective products.

WP Ultimate CSV Importer Pro
Get Ultimate CSV/XML Importer to import data on WordPress faster, quicker and safer.
Advanced Topics: #
Match Reviews Based on Product IDs. #
Matching reviews to products is a critical step when importing WooCommerce reviews. By default, WP Ultimate CSV Importer uses product IDs to associate reviews with their corresponding products. Ensuring the accuracy of product IDs in your import file is essential for a successful import process.
Key Steps to Match Reviews Using Product IDs #
- Prepare the Import File: Ensure your CSV file includes a column for product IDs. Each product ID must correspond to an existing product in your WooCommerce store.
- Verify Product IDs: Double-check that the product IDs in your file are valid and correctly formatted. Incorrect or nonexistent product IDs will result in skipped reviews.
- Map Fields During Import: In the WP Ultimate CSV Importer mapping step, assign the appropriate column in your CSV to the “Product ID” field. This ensures the importer knows how to associate each review with its respective product.
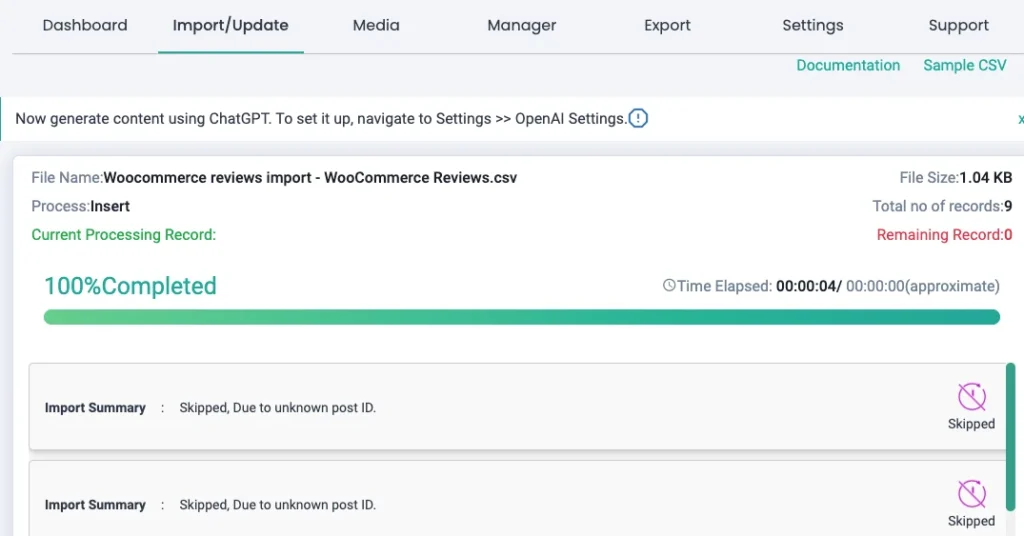
- Monitor Logs for Errors: Review the logs for skipped reviews or mismatches after running the import. Logs will show entries like:
“Skipped due to Unknown Product ID”
Troubleshooting Common Issues #
- Product Not Found: Verify the product ID exists in your WooCommerce database.
- Mismatched Data: Ensure no formatting issues (e.g., extra spaces) in the product ID column of your CSV file.
By correctly utilizing product IDs, you can streamline the import process and ensure that reviews are accurately assigned to their corresponding products.
Steps to Export WooCommerce Reviews #
To export WooCommerce Reviews,
- Navigate to the WP Ultimate CSV importer pro and select the Export option.
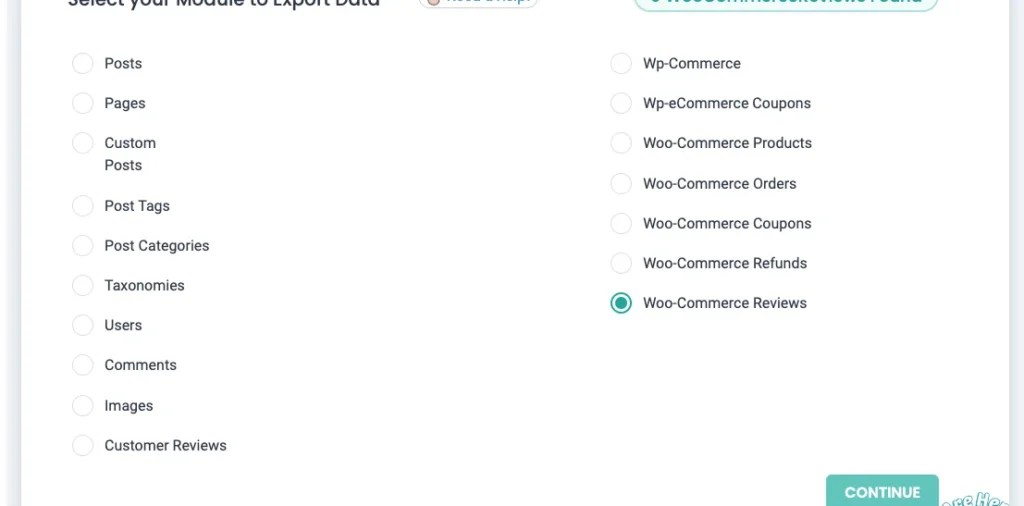
- Choose the data type as WooCommerce Reviews.
- Map the columns fields for the export file. Enter the file name and file type.
- Use the advanced filter to export your WooCommerce Reviews field as more specifically. To know more about the advanced filter, refer to the exporter guide.
- You can also schedule the export to export your record at your desired time interval.
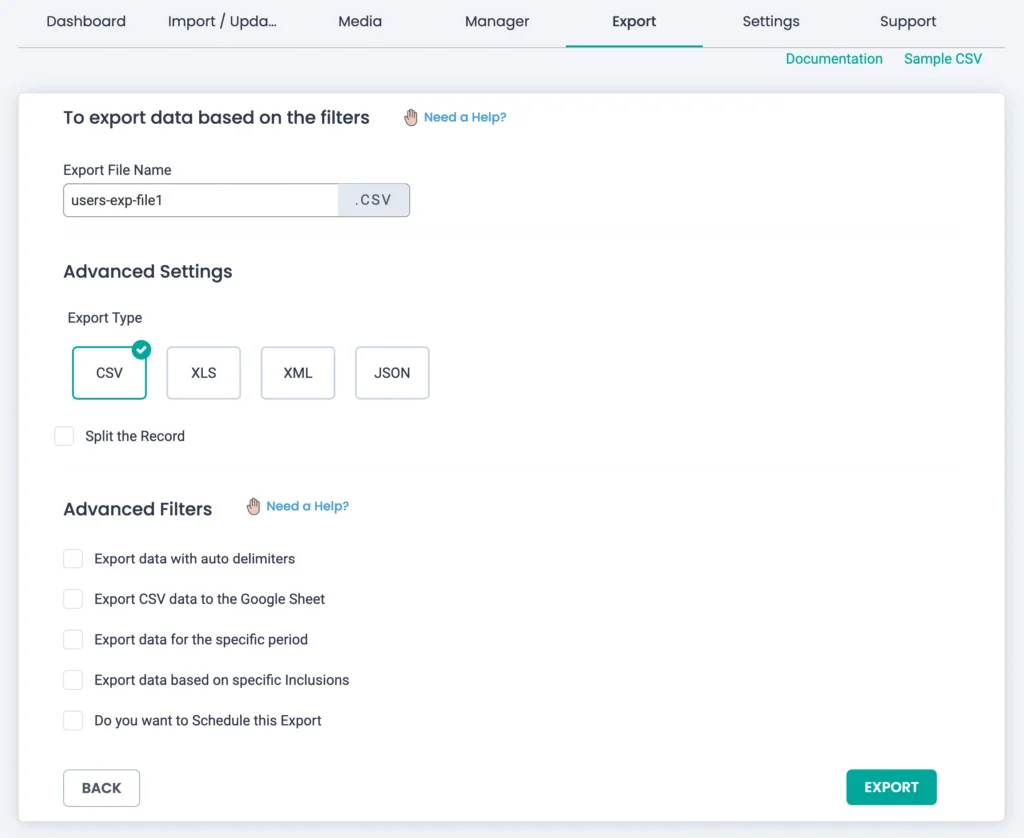
- Click on Export.

WP Ultimate CSV Importer Pro
Get Ultimate CSV/XML Importer to import data on WordPress faster, quicker and safer.
FAQ: WP Ultimate CSV Importer for WooCommerce Reviews #
1. Why are my reviews not importing?
Reviews may not be imported if the associated product cannot be matched. Check your CSV file to ensure the product ID matches an existing product in your WooCommerce store.
2. Where does WooCommerce store its reviews?
WooCommerce stores reviews in the wp_comments table in the WordPress database. These reviews are managed through the WooCommerce Import Add-On.
3. How do I add a product review manually?
To manually add a review:
- Go to Products › All Products in your WordPress dashboard.
- Select the desired product and locate the Reviews section.
- Click Add to input the review details.
4. How do I import multiple reviews at once?
To import bulk reviews, prepare your CSV file with all the review details. Use the WP Ultimate CSV Importer plugin, map the fields, and run the import. For larger imports, consider adjusting the batch processing settings.
5. How can I migrate reviews between sites?
To migrate reviews:
- Export reviews from the source site using the export option of the WP Ultimate CSV Importer Pro plugin or WP Exporter Plugin
- Use the migration bundle file, which includes import instructions.
- Import the bundle on the destination site with the WP Ultimate CSV importer Pro plugin.
6. What plugins are required for importing reviews?
The WooCommerce Import Add-On is required alongside WP Ultimate CSV Importer to import reviews efficiently.
