Vtiger MailChimp Plus Integration is a Vtiger extension module that lets to sync Campaigns and Audience between MailChimp and VtigerCRM bidirectionally. It combines your marketing and sales team together to do tasks efficiently by understanding customer’s interests. The sync can be triggered at an instant or you can schedule it to perform automatically on a periodic basis. You can either sync all or selected records from CRM to email marketing tool MailChimp. The sync is performed securely with MailChimp API 3.
Pre-Requisites
- Supports Vtiger CRM versions 6.5 – 7.4
- MailChimp API Version 3.0
- Requires ionCube Loader version of 4.0 or higher. Download the appropriate ionCube Loader based on your server’s version of php.
- Enable CRON on your server by adding the following entry:
*****wget -o /dev/null -q -O /dev/null {site_URL}/vtMailChimpCron.php.php 2>&1
Language localisation
Multi language support for 14 languages. Supported language:
- US English
- PT Brasil
- ES Mexico
- DE Deutsch
- Romana
- Turkce Dil Paketi
- British English
- Russian
- Swedish
- J?zyk Polski
- ES Spanish
- Pack de langue français
- IT Italian
- NL-Dutch
- HU Magyar
Read our blog to know the latest updates on all our Vtiger CRM Modules & Extensions.
Installation and Configuration #
Module Installation in Vtiger
- Before installing the module in Vtiger, for secure installation take a backup of your database and files.
- If you are using Vtiger version 6.0, install the module by visiting ‘CRM Settings -> Module Manager -> Install from zip’.
- For Vtiger 7.0 users, Go to ‘Settings -> CRM Settings -> Modules -> Import Module From Zip’.
- Then upload the Mailchimpplus.zip file and click on the Import button. Finally, select ‘Import Now’ to finish importing.
Module Configuration #
Your MailChimp account is configured with secure MailChimp API v3. To integrate your MailChimp account in CRM,
For version 6.5 users, Go to All -> Marketing & Sales -> MailChimpPlus -> Settings -> Edit.
For 7.0 users, Go to Marketing -> MailChimpPlus -> Settings -> Edit.
- Provide your MailChimp API key.
- Enable/Disable Sync Contacts, Sync Leads and Sync Accounts to sync Contacts, Leads and Accounts data between Vtiger CRM and MailChimp.
- Enable ‘Retrieve data from Mailchimp if record is deleted in CRM?’ to get back your data from MailChimp if it is deleted in CRM.
- To sync all your records only as Contacts, or Leads or Accounts, choose the value from ‘Default Module’ drop down.
- Allow only some records to be involved in the sync process by enabling the ‘Sync Selected Records?’ option.
- Enable the ‘Sync Campaign and the members who received it?’ to sync the MailChimp Campaigns to Vtiger CRM with emails sent list.
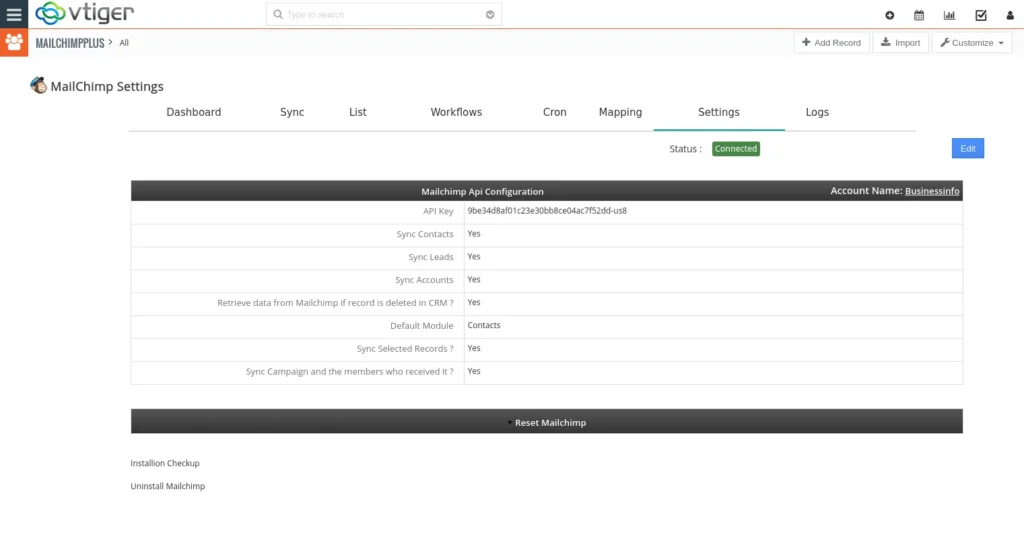
You can reset the MailChimp API Configuration using the ‘Reset Mailchimp’ option. Uninstalling and reinstalling the module within Vtiger is also possible. To uninstall the module, just click on the ‘Uninstall Mailchimp’.
MailChimp Custom Field Creation #
- Create custom fields to assign the records as Leads, Contacts or Accounts. The custom field name should be VTMODULE. The values can be Leads, Contacts or Accounts.
- Assign the value for each record or list of records, if the values are not assigned, the records will be synced based on the default settings configured in MailChimp Integration module for Vtiger.
- The custom field needs to be created for each and every Audience separately.
Choose an Audience ? Settings ? Manage Audience ? Audience fields and |MERGE| tags
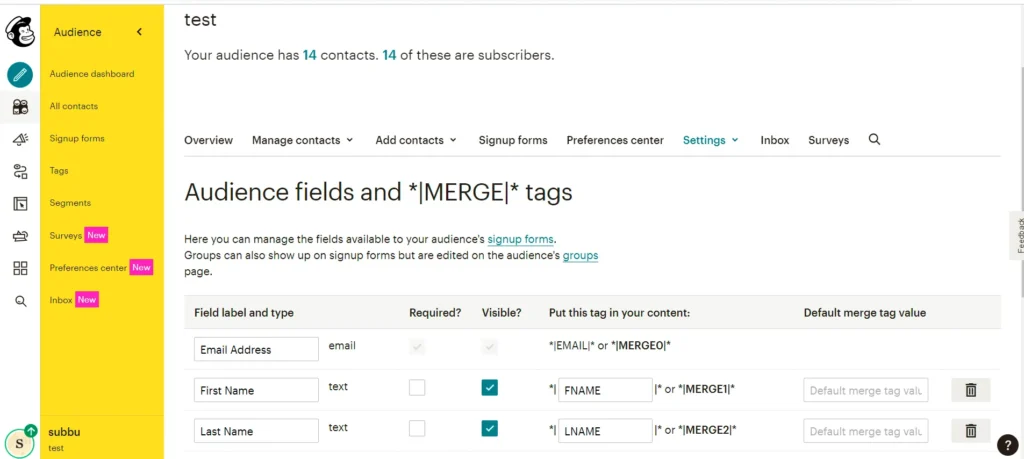
Create the custom field VTMODULE
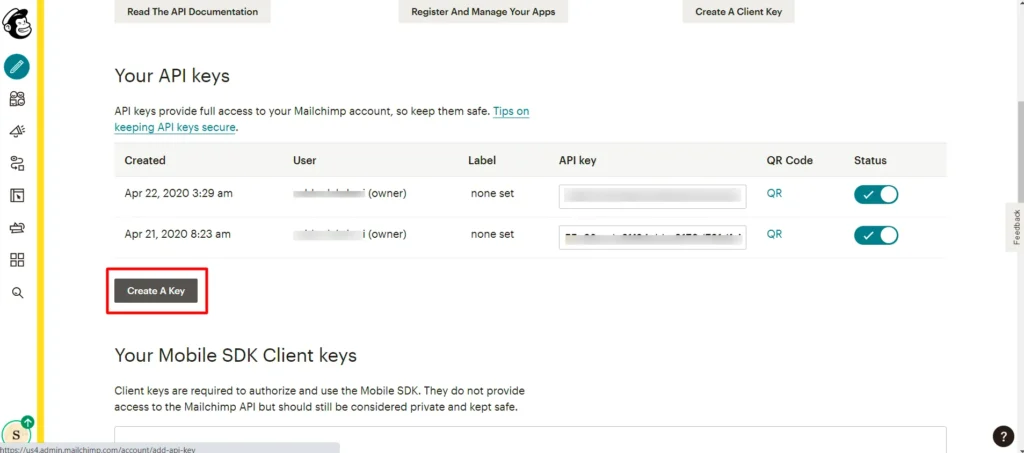
Get MailChimp API Key #
Login to MailChimp Account,
- Go To User ?Account
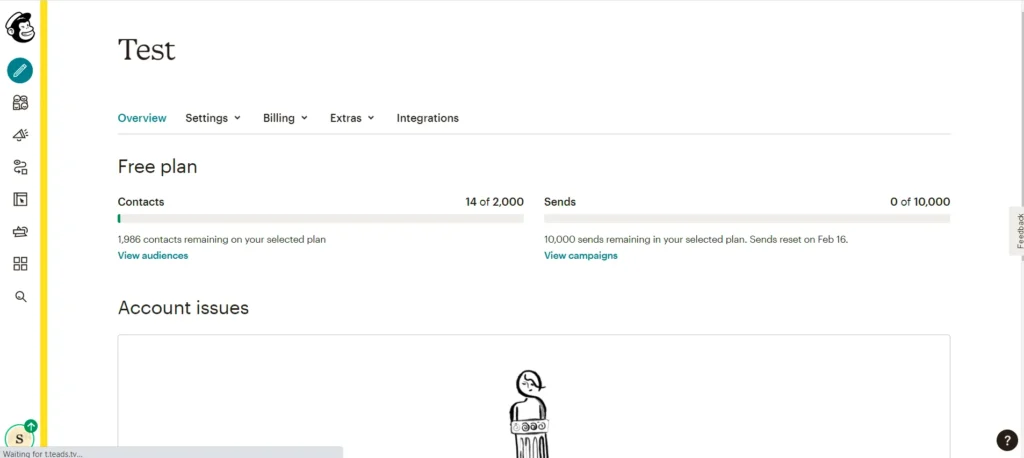
- Choose Extras ? API Keys
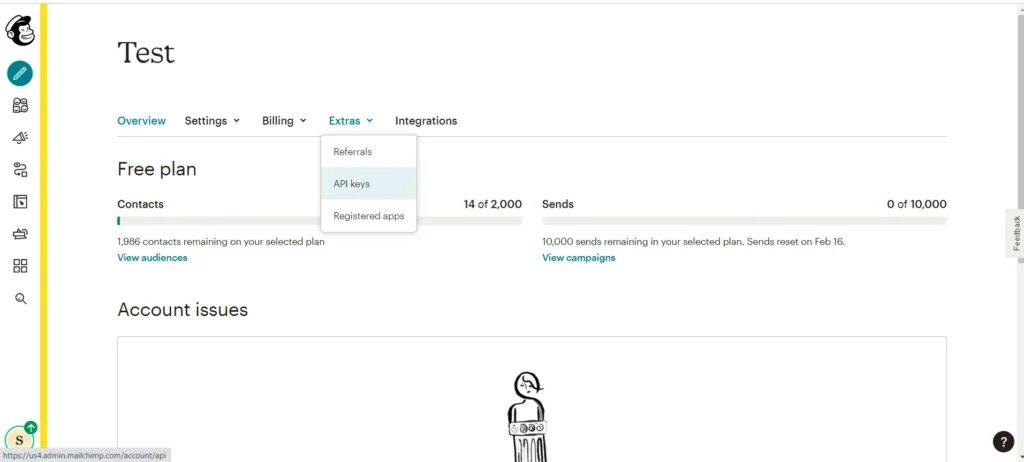
- Click on Create A Key.
Note:
- When updating campaigns, only contents will get updated to MailChimp.
- Fetching the MailChimp Audience and Campaigns will only get the Audience/Campaigns from MailChimp. It won’t create any new Campaigns or Lists in Vtiger CRM.
Frequently Asked Questions #
1. How to fix “Permission to perform this operation denied for name problem” error?
The problem is due to the missing entries in the **vtiger_ws_entity** table in your database.
Check whether the module entries are inserted in the vtiger_ws_entity table. (MODULES – VTMailChimpLists, VTMailChimp, VTMailChimpGroups, VTMailChimpGroupings). If not, take the backup copy of your vtiger database.
Add required entries in your database by running below query.
insert into vtiger_ws_entity (name,handler_path,handler_class,ismodule) values(‘MODULES‘,’include/Webservices/VtigerModuleOperation.php’,’VtigerModuleOperation’,’1?);
2. How to uninstall the installed Vtiger MailChimp?
To uninstall the package after 15 days of trial and the package installed in the wrong domain follow the simple procedures listed below.
First take the backup copy of your instance. before follow the uninstallation procedure
Copy and paste the attached file in your Vtiger CRM root folder.
In browser run the following the URL
Remove the following folders manually in your CRM.
- yourcrm/modules/VTMailChimp
Remove the workflows manually. Go to settings ? Workflow
- Add/Remove Contacts from/to MailChimp Lists
- Add Contacts to MailChimp Lists on First Save
- Add/Remove Accounts from/to MailChimp Lists
- Add Accounts to MailChimp Lists on First Save
- Add/Remove Leads from/to MailChimp Lists
- Add Leads to MailChimp Lists on First Save
