Table of Contents
Are you looking for a way to bring consistent revenue into your business without relying on one-time purchases? Subscription products might just be your new best friend. Whether you’re selling curated coffee boxes, exclusive content, WordPress hosting, or a Software-as-a-Service (SaaS) product, subscriptions allow you to earn ongoing income while delivering continuous value to your customers.
And here’s the good news—setting up a subscription product in WooCommerce is easier than you think. You don’t need to be a tech wizard, and with the right tools, you can have everything up and running in no time. Intrigued? Great! Let’s break it all down step by step.
Why Subscriptions Are a Game-Changer
Think about this—imagine having predictable revenue every month AND keeping your customers happy with automated, hassle-free service. Subscriptions create a win-win scenario for you and your buyers. They simplify purchasing for your customers, reduce churn, and build long-term relationships.
But you may be asking, how do I actually set this up? Enter WooCommerce, the powerful e-commerce platform that makes subscription-based selling smooth and customizable. Whether you’re offering monthly memberships or yearly plans, it’s a flexible solution that integrates seamlessly into your online store.
Step-by-Step Guide to Setting Up WooCommerce Subscriptions
Step 1: Get the WooCommerce Subscriptions Plugin
Here’s the thing—WooCommerce doesn’t support subscriptions out of the box. That’s where the WooCommerce Subscriptions Plugin comes in. It’s one of the most reliable plugins specifically designed for recurring payments and subscription management.
Here’s how to install the plugin:
- Download the “WooCommerce Subscriptions” plugin from the WooCommerce marketplace.
- Log in to your WordPress dashboard.
- Go to Plugins > Add New, upload the `.zip` file, and click Install.
- Activate the plugin!
That’s it! You’re now ready to roll! Make sure your plugin is activated before moving on to the next step.
Step 2: Choose a Payment Gateway for Recurring Payments
Subscription products require a payment gateway that supports recurring billing, so not all standard options will work. You want to ensure that your customers can make monthly or yearly payments automatically (no one wants to manually deal with reminders, right?).
Some popular gateways include:
- Stripe (great for most businesses and super easy to set up)
- PayPal (widely trusted by customers worldwide)
- Square (a fantastic all-in-one solution for small businesses)
Pick the one that works best for you, and integrate it with WooCommerce Subscriptions.
Step 3: Create Your Subscription Product
Now it’s time to actually add your subscription product. There is a detailed documentation available for WooCommerce Subscriptions plugin. Here’s how:
- Go to your WordPress dashboard and click on Products > Add New.

- Give your product a name. For instance, if you’re setting up a monthly plan for WordPress hosting, you could call it “WP Hosting – Monthly Plan.”
- (Optional) Add a quick product description. While this isn’t required now, providing a clear and compelling description later will help convert potential customers.
Easy so far, right?
Step 4: Configure the Product as a Subscription
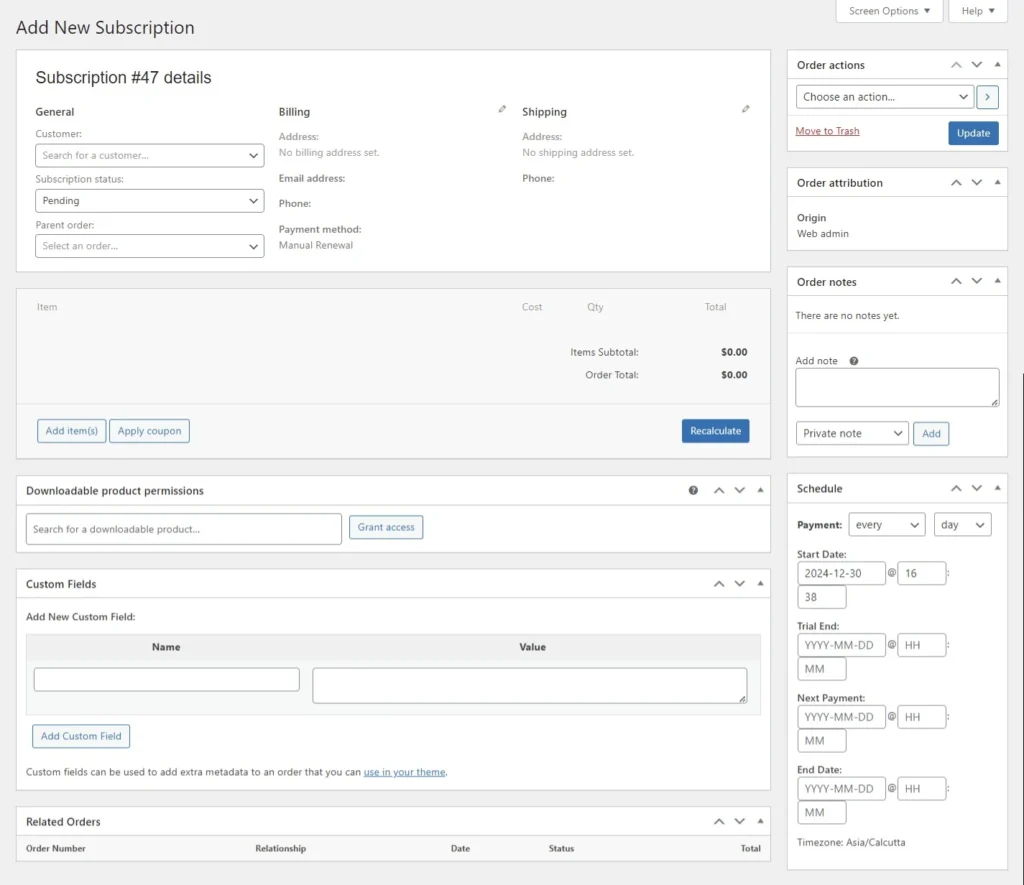
Scroll down to the Product Data section, and here’s where the magic happens:
- Select Simple Subscription from the Product Type dropdown menu.
- Set the price for your subscription. For example, $10/month.
- Offer a free trial period? You can! Just set a trial period—14 days is a popular choice.
- If this is a virtual product (like a service or digital download), check the Virtual box. This skips any unnecessary shipping details.
Pro-tip 💡: Free trials are a powerful way to entice new customers. If you’re confident in your product’s value, giving people a taste of the experience can lead to long-term subscribers.

WP Ultimate CSV Importer Pro
Get Ultimate CSV/XML Importer to import data on WordPress faster, quicker and safer.
Step 5: Manage Inventory Settings
While subscriptions often don’t involve physical stock, it’s still worth updating the inventory tab for easy product tracking:
- Add a unique SKU (e.g., “SUB-001” for your subscription).
- If you’re offering a limited number of subscriptions (e.g., limited spots for an exclusive coaching service), enable stock management.
Optional Tip! If you don’t want customers buying multiple subscriptions, check the “Sell Individually” box.
Step 6: Set Up Subscription Durations and Other Details
Head over to the General tab, and make sure your subscription details are spot-on:
- Set the Subscription Expiration to “Never,” if you want the payments to continue until the customer actively cancels.
- If you want to eliminate upfront costs, leave the Sign-Up Fee blank.
- Double-check your configuration. For example:
- Sign-Up Fee = $0
- Trial Period = 14 days
- Billing = $10/month
- Subscription Expiration = Never
Consistency is key. Confirm that your free trial and pricing details align across all areas.
Step 7: Add a Product Image
A picture speaks a thousand words! Upload a clean, professional image that represents your product. Click Set Product Image in the right-hand sidebar. The better your visuals, the more likely customers are to click “Buy.”
Step 8: Enable Product Reviews
Customer reviews are gold for building trust. If you want people to leave feedback on your subscription product, enable this feature under Product Settings. If not, simply turn it off.
Step 9: Test and Publish Your Subscription Product
Before launching, it’s always a good idea to do a quick test run:
- Place a test order yourself to ensure everything works as expected (pricing, recurring billing, trial periods, etc.).
- Check the customer flow so you can fix any confusing steps BEFORE paying customers encounter them.
When everything’s good to go, hit Publish, and your subscription product will instantly go live!
Pro Tips to Maximize Subscription Success
Now that you’ve set up your first product, here are some strategies to take it to the next level:
- Upsell Opportunities – Offer exclusive add-ons or bundles for your subscribers.
- Monitor Performance – Regularly check your WooCommerce dashboard to see trends in subscription activity. Are customers loving it? Could you tweak something to improve retention?
- Listen to Customers – Collect feedback from your subscribers so you can continue refining and enhancing their experience.

WP Ultimate CSV Importer Pro
Get Ultimate CSV/XML Importer to import data on WordPress faster, quicker and safer.
Final Thoughts
Subscriptions are the future of e-commerce. They don’t just create reliable revenue streams; they foster stronger connections with your audience and offer them incredible convenience. Whether you’re selling monthly memberships, digital courses, or SaaS products, WooCommerce Subscriptions make it easy to get started.
Why wait to take your business to the next level? Start setting up subscription products today, and watch your revenue grow—month after month.
