Table of Contents
Gravity Forms is a powerhouse for creating dynamic forms on WordPress websites. From collecting customer feedback and managing surveys to handling event and user registrations, Gravity Forms entries often hold critical data. But what if you need to migrate these entries to another WordPress site or restore them from a backup? We’ve got you covered. WP Ultimate CSV Importer Plugin can help you with this. In this article, we explain how to migrate Gravity Forms entries with WP Ultimate CSV Importer in simple and easy steps.
Why Import Gravity Forms Entries into WordPress?
Importing Gravity Forms entries is essential in several scenarios like site migrations, backup restoration, and data consolidation.
- Site Migration: Moving your forms and their data to a new WordPress site.
- Backup Restoration: Restore lost entries from a backup.
- Data Consolidation: Combining entries from multiple forms or sites into a single database.
Why WP Ultimate CSV Importer Plugin for Gravity Forms Entries Import & Export?
WP Ultimate CSV Importer is a versatile WordPress plugin designed especially for importing and exporting data into WordPress via CSV or XML files. For Gravity Forms users, it offers:
- Effortless Mapping: Map CSV or XML fields to Gravity Forms fields for accurate data import.
- Bulk Imports: Handles thousands of entries without breaking a sweat.
- Update Existing Entries: Easily update existing entry data in WordPress.
- Error Handling: Identify and fix issues with your data after the import easily using the import log.
- Scheduled Imports and Exports: Automate the process for recurring data updates and backups.
- Data Backup: Download your form entries as CSV or other file types for quick backups.
Preparing Your Gravity Forms Entries for Import
WP Ultimate CSV Importer can migrate your form entries, import their data, and update existing entries data. Before starting the import, ensure your data is ready in a CSV or XML file type. If you want to export the form entries first, then follow these steps.
How to Export Gravity Forms Entries
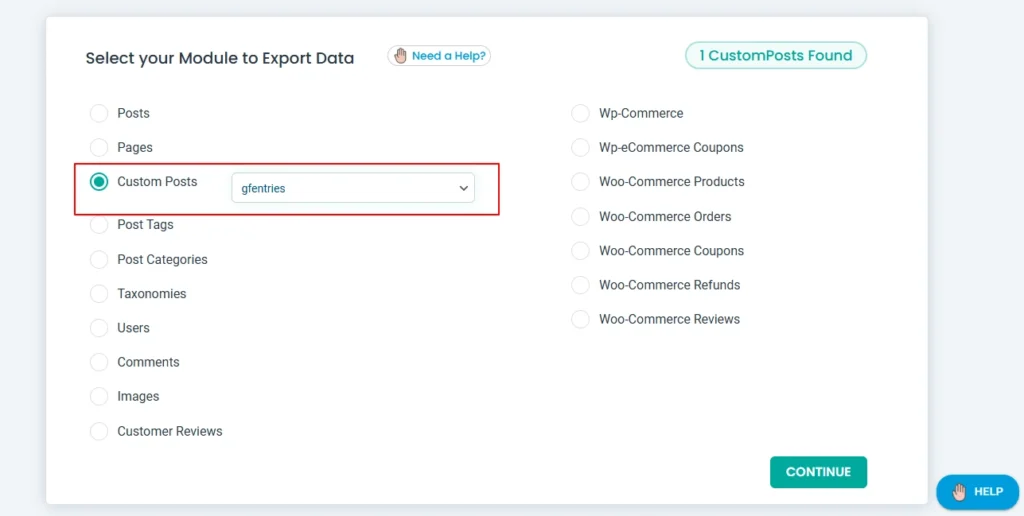
To export your entries, use the WP Ultimate CSV Importer export feature to save your entries as a CSV or an Excel file. Go to Export and choose Custom Posts > GFEntries from the modules list.

Choose the format of your file like CSV, XML, or Excel. Provide a file name and click Export. All your Form entries will be exported and ready to download. Once downloaded, ensure your exported file includes all required fields and values that match the format needed for import. Remove unnecessary columns and edit the data if needed to prepare it for the import.

WP Ultimate CSV Importer Pro
Get Ultimate CSV/XML Importer to import data on WordPress faster, quicker and safer.
Step-by-Step Guide to Import Gravity Forms Entries
Follow these steps to import your Gravity Forms entries using WP Ultimate CSV Importer.
Step 1: Upload Your File
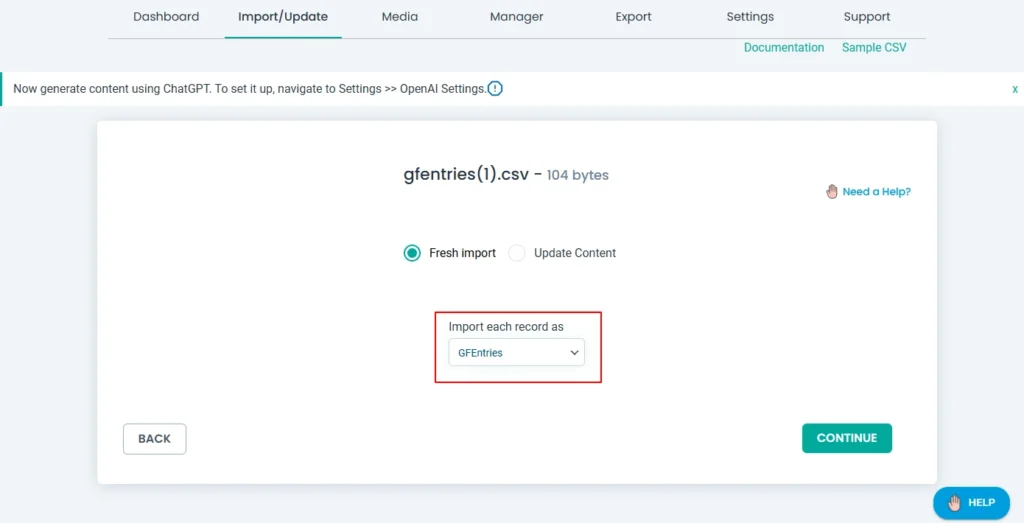
Navigate to WP Ultimate CSV Importer > Import/Update. Upload your CSV/XML file. Select Gravity Forms Entries as the post type. For instance, select the option ‘GFEntries’ from the import each record as a dropdown in the importer.

Step 2: Map Your Gravity Forms Fields
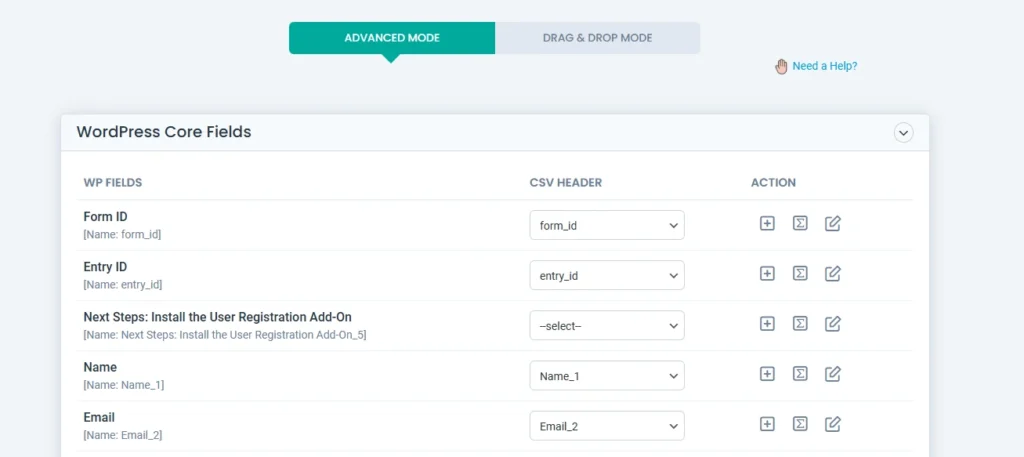
Use the intuitive drag-and-drop interface to map your CSV columns to the corresponding Gravity Forms fields. Alternatively, use the standard mapping mode to align your Gravity Forms fields with the headers. Double-check the mapping to avoid mismatched data entries. The plugin will import the data to the fields based on these fields mapping.

Step 3: Run the Import
Click the Import button to start the process. The CSV Importer plugin will start to import the gravity form entries. Monitor the progress to address any errors during the import without leaving the screen. Once done, you’ll have the option to download the import log. Download and check for the records import statuses.
Step 4: Verify the Imported Data
Go to your Gravity Forms entries directly to confirm the successful import. That’s everything you need to know about importing Gravity Forms entries using WP Ultimate CSV Importer.
Best Practices for a Smooth Import
To ensure a seamless experience,
- Organize Your Data: Keep your CSV/XML file clean and structured.
- Validate Your CSV/XML: Use a CSV or XML validator tool to check for formatting errors.
- Start Small: Test the import process with a small dataset before uploading large files. Contact our team for any support with importing bulk records.
Troubleshooting Common Issues
Here are some solutions to general problems you might encounter:
- Mismatched Fields: Double-check your field mapping during the import step.
- Large File Imports: Split your CSV into smaller files or increase the PHP upload limit on your server.
- Error Messages: Use the detailed error logs provided by the plugin to identify and fix issues.
If you’re still stuck, reach out to our support team at [email protected] for personalized assistance.
Conclusion
Importing Gravity Forms entries is as easy as Exporting Gravity Forms Entries in WordPress when you do it with WP Ultimate CSV Importer. The plugin makes the process really quick, efficient, and error-free. Ready to get started? Purchase and download WP Ultimate CSV Importer today to streamline your Gravity Forms import and export process!

WP Ultimate CSV Importer Pro
Get Ultimate CSV/XML Importer to import data on WordPress faster, quicker and safer.


