Table of Contents
Have a store idea but don’t know where to start? Launching an online store might sound complicated, but with WordPress, it’s simpler (and more exciting!) than you’d think. This step-by-step guide will help you create your very own online store—from selecting the right hosting to launching your first product. By the end, you’ll have a functional store that’s ready to wow your customers.
Why Pick WordPress for Your Store?
Here’s a fun fact—WordPress powers nearly 40% of all websites globally. Whether you’re starting small or dreaming big, WordPress grows with you. It’s flexible, scalable, and packed with over 59,000 plugins that can turn your site into a powerhouse. Want a unique design? Easy-to-use tools like WooCommerce and themes ensure your store stands out.
Now, ready to roll? Here’s how to bring your store to life in 8 simple steps.
Step 1. Choose the Right Hosting (This Is Your Foundation!)
Before you even start designing, you need a home for your website. Think of hosting as the “foundation” of your online store. A solid hosting plan ensures your site is fast, secure, and always up and running for potential shoppers.
What to Look for in Hosting:
- WordPress Optimization: Choose providers specializing in WordPress with tools that make your life easier.
- Speed & Security: Fast loading saves customers from bouncing off your page. Security protects you AND your buyers.
Recommended Hosting Provider:
We love Hostinger or Bluehost for its blend of affordability and reliability. They’ve got plans for everyone:
- Single Shared Hosting (great for beginners)
- Premium Shared Hosting (ideal for growing businesses)
- WordPress Hosting (for optimized performance).
Hot tip! Most first-timers find the Premium Shared Hosting plan hits just the right mix of cost and features.
Step 2. Install WordPress in Minutes
Once your hosting plan is active, it’s time to install WordPress. Hosting providers like Hostinger make this super simple with tools like an Auto Installer.
Quick Install Steps:
- Log in to your Web Hosting account.
- Navigate and find the Auto Installer.
- Select “WordPress,” enter your site’s name, username, and password, and hit the Install button.
Success! You’ve just set the stage for your store—give yourself a high five!

WP Ultimate CSV Importer Pro
Get Ultimate CSV/XML Importer to import data on WordPress faster, quicker and safer.
Step 3. Choose the Perfect Theme
Your theme sets the tone for your brand. Luckily, WordPress offers thousands of free and premium themes tailored for online stores. A sleek and professional look ensures customers trust your site.
Top eCommerce Themes We Recommend:
- Astra: Lightning-fast and easy to customize.
- Storefront: WooCommerce’s official theme, made for seamless integration.
- OceanWP: Stylish and highly functional, perfect for pros.
How to Install Your Theme:
- Go to your WordPress admin panel at `yourdomain.com/wp-admin`.
- Navigate to Appearance > Themes > Add New.
- Search for your chosen theme (we’re big fans of Astra!), click Install, then hit Activate.
📌 Pro Tip: Astra comes with pre-made templates designed just for eCommerce stores. Install one with a single click. Easy, right?
Step 4. Customize Your Site with Elementor
Who says you need to code to make your site beautiful? The Elementor plugin is a drag-and-drop page builder that puts YOU in charge. You can tweak fonts, colors, layouts, and more—no tech skills needed.
How to Start with Elementor:
- Go to Plugins > Add New in WordPress.
- Search for “Elementor” and click Install Now.
- Open Elementor, and start building! Add sections, images, buttons—get creative.
Think of it as your playground for design—build pages that reflect YOUR vibe.
Step 5. Set Up WooCommerce
Here’s where the magic happens—WooCommerce turns your WordPress site into a fully functional online store.
Install WooCommerce:
- Go to Plugins > Add New and search for “WooCommerce.”
- Click Install and Activate.
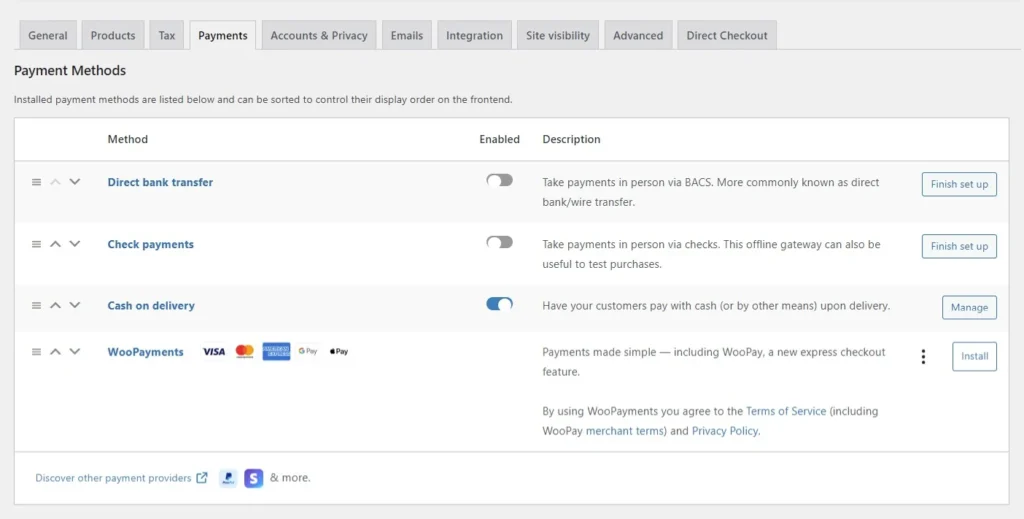
- Run the setup wizard and configure the essentials like currency, shipping methods, and payment gateways (we recommend PayPal or Stripe for easy payments).

And just like that, your store can start processing orders .
Step 6. Add Your First Product
It’s time to stock your shelves! Adding items in WooCommerce is wonderfully straightforward.
Simple Steps to Add Products:
- Go to Products > Add New.
- Fill in the product name, description, and price.
- Upload clear, high-resolution images of your product from all angles.
- Assign categories to make it easy for customers to browse.

🎯 Bonus Tip for Listings: Write product descriptions focusing on benefits. Answer key customer questions—why would they LOVE this product?
Step 7. Fine-Tune and Optimize
Before you go live, here’s how to make your store shine:
- Install Essential Plugins: Boost functionality with must-haves:
- Yoast SEO for search optimization.
- WP Rocket for faster site loading.
- WooCommerce Subscriptions if offering recurring billing.
- Add Security: Install something like Wordfence to keep hackers away.
- Backups: Use your hosting platform or plugins like UpdraftPlus to securely backup your data.
Step 8. Launch Your Store
You did it! Your online store is ready to dazzle the world. But wait—launch it strategically:
- Test, test, test! Run mock transactions and check links on desktop AND mobile.
- Make noise: Announce your store on social media, email your list, and don’t forget to ask your friends to share it.

WP Ultimate CSV Importer Pro
Get Ultimate CSV/XML Importer to import data on WordPress faster, quicker and safer.
Why Wait? Get Started Today!
Building an online store doesn’t have to feel overwhelming. With tools like WordPress, Hostinger, Astra, and WooCommerce, you’ve got everything you need to make your business dreams a reality.
Feeling inspired? Take action now—set up your store today and grab the spotlight in the world of eCommerce. You’ve got this!


