Migrating a WordPress or WooCommerce site can be a complex process, requiring multiple steps to export, configure, and re-import data while ensuring nothing is lost or misconfigured. The One-Click Import & Migrate feature in WP Ultimate CSV Importer eliminates these challenges, allowing users to transfer all essential WordPress and WooCommerce data—including posts, products, users, and custom fields—in just a few clicks.
Follow the instructions below to export and import data seamlessly using the Migrate & One-Click Import feature.
Before starting the migration process, ensure you have WP Ultimate CSV Importer Pro installed and activated on both the source and destination WordPress sites.
How to Export Data from the Source Site #
First of all, we need to get the export file to migrate the content to your destination site. You can export post types individually to ensure easy transfer between sites.
Step 1: Select the Data to Export #
Navigate to WP Ultimate CSV Importer > Export. Choose the module you want to migrate: Posts, Pages, WooCommerce Products, Users, or Other Custom Post Types.
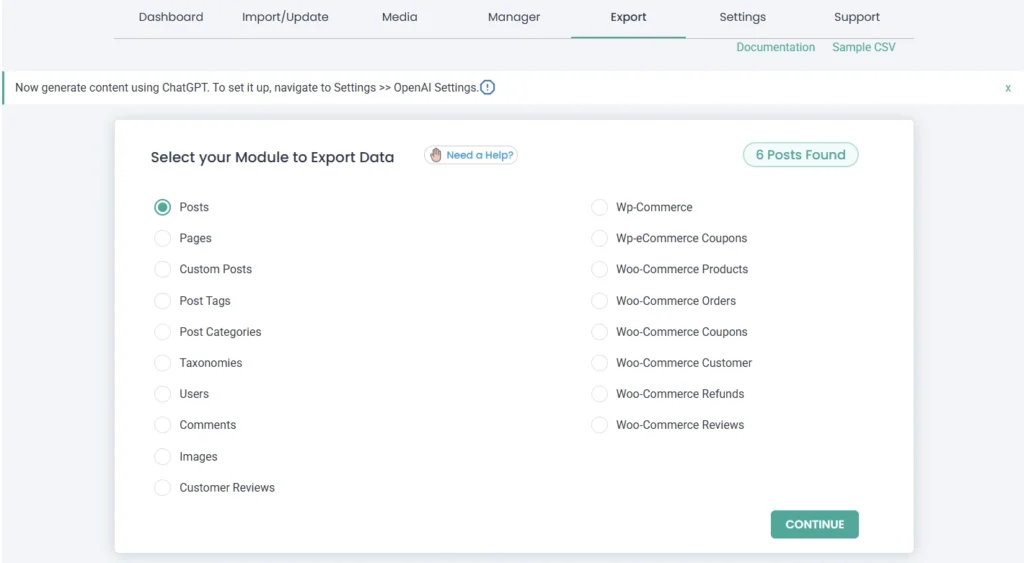
Click Continue.
Step 2: Configure Export Settings and Download the file #
Provide a file name for the export and choose one file type from the list. You can export in Excel format now.
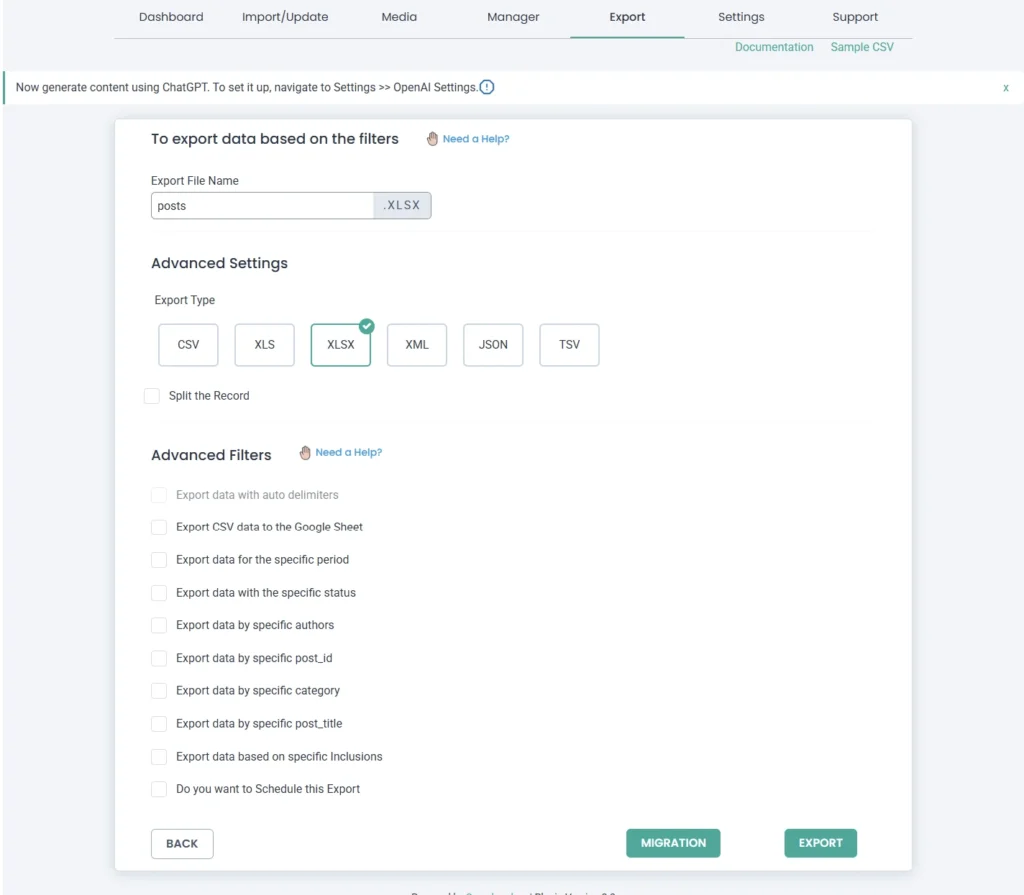
Configure advanced filters if you need. Then click ‘Migrate’ instead of Export.
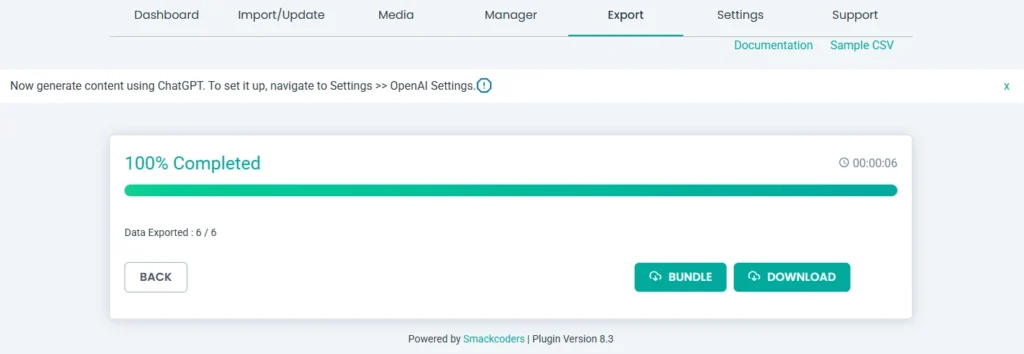
The plugin will automatically generate a ZIP bundle containing all data, and default mapping info.
Click the Bundle button to download and save the ZIP file securely to your device.

WP Ultimate CSV Importer Pro
Get Ultimate CSV/XML Importer to import data on WordPress faster, quicker and safer.
How to Import or Transfer Data to the Destination Site with One-Click Import #
Now we have the exported bundle file containting all the data and mapping settings. Follow the below steps to easily complete the import.
Step 1: Upload the ZIP File #
Navigate to WP Ultimate CSV Importer > Import/Update. Click Browse and upload the zip file. Select the ZIP file you downloaded earlier (no need to unzip it).
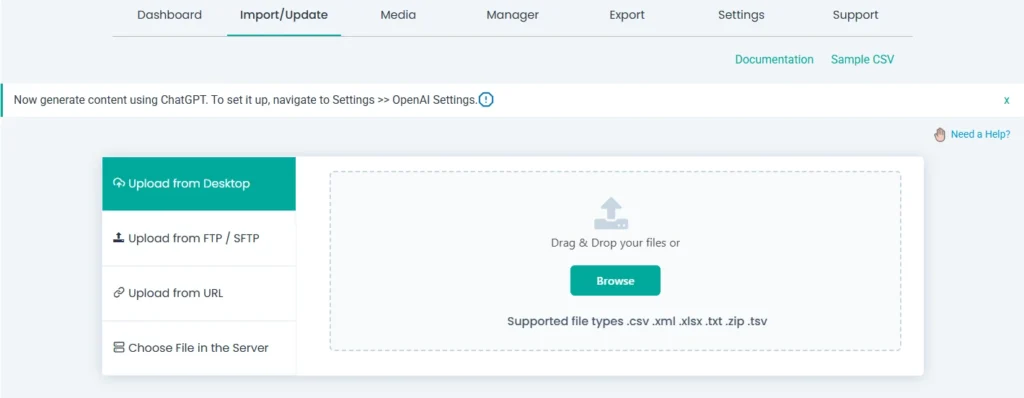
Step 2: Start the Migration #
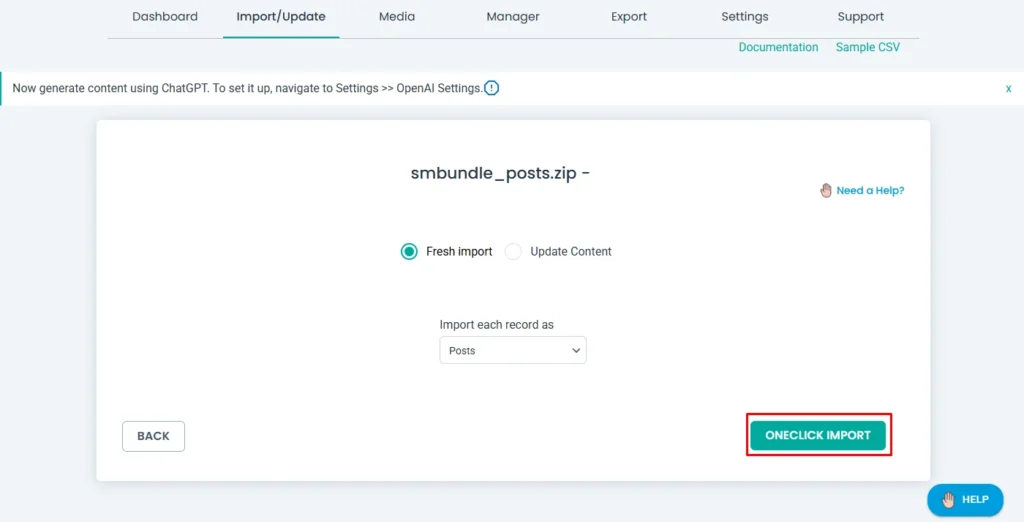
Once you upload the zip file, click the OneClick Import button. You will be navigated straight to the Import Configuration section.
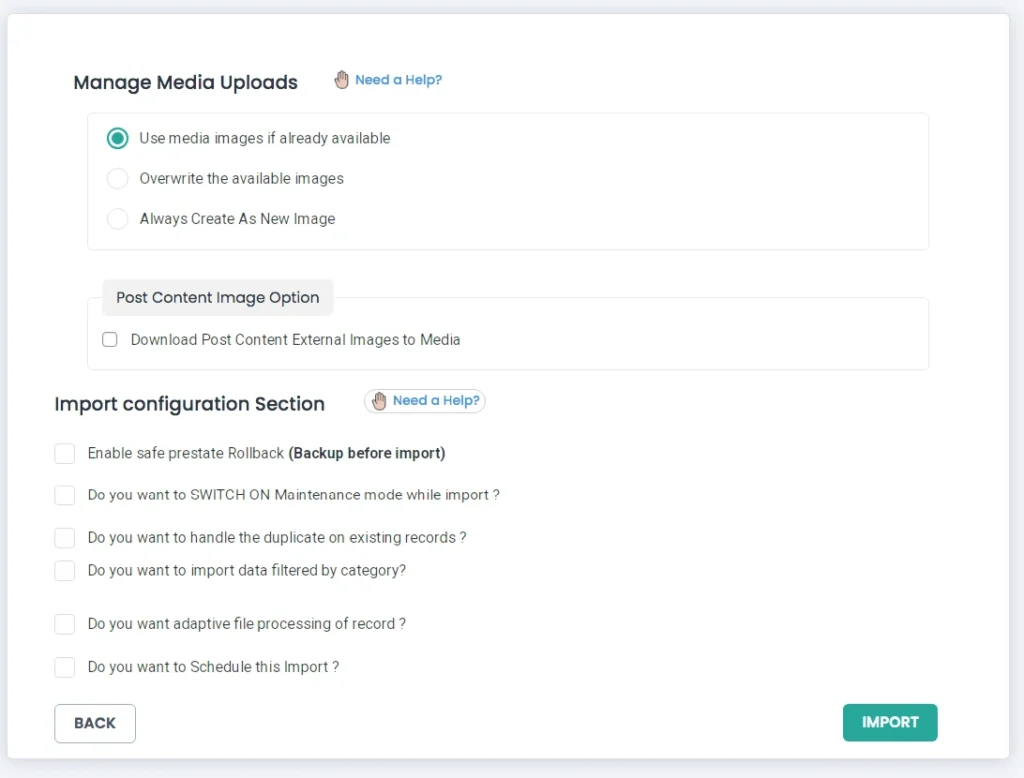
Here you can just configure the import settings like rollback, and other options.
The plugin will automatically detect and apply the correct mapping settings. If necessary, use the Back button to adjust mapping templates and other configurations.
Now click Import to complete the migration process.
Step 3: Verify Imported Data #
Navigate to the respective WordPress sections (Posts, Pages, Products, Users, etc.). Check the imported data for accuracy.

WP Ultimate CSV Importer Pro
Get Ultimate CSV/XML Importer to import data on WordPress faster, quicker and safer.
