Importing customers is as simple as importing other WooCommerce post types. You need to prepare your import file with customer details, upload the file to the importer, map the fields, and run the import.
Download the sample CSV file for import WooCommerce customer and test try in our trial instance.
Step 1: Start a New Import #
Navigate to your WordPress dashboard. If you’ve installed WP Ultimate CSV Importer, locate the plugin page. In the Import/Update tab, choose an import method and upload your customer file. On the next page, select WooCommerce Customers as the import post type.
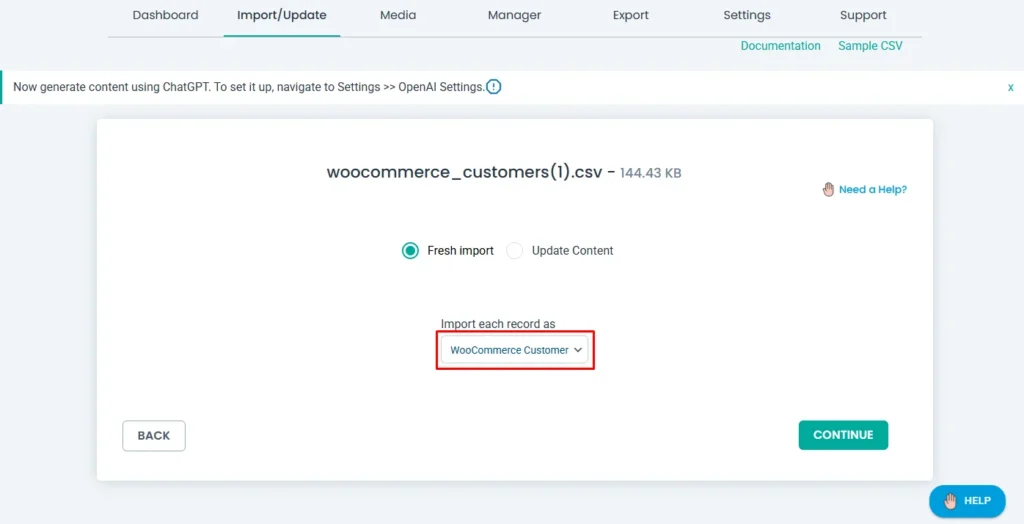
Click Continue to proceed.
Step 2: Mapping WooCommerce Customer Fields #
Next, map the fields in your CSV or XML file to the corresponding WooCommerce customer fields in WordPress. If the file headers match the WordPress fields, the plugin will auto-map them. Otherwise, you can manually map fields using the dropdown menu or the drag-and-drop method.
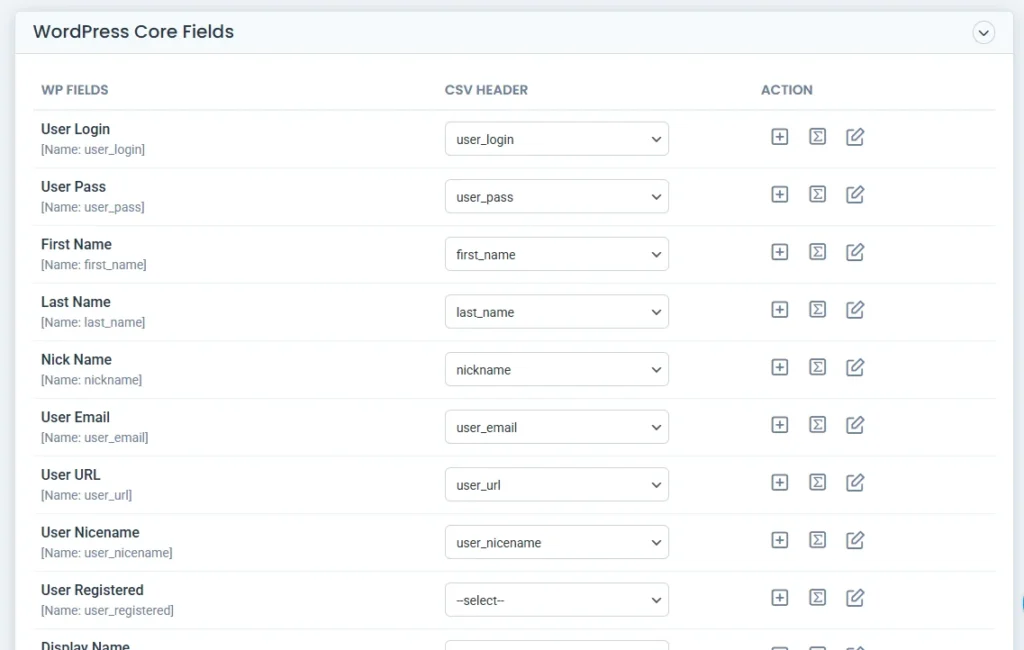
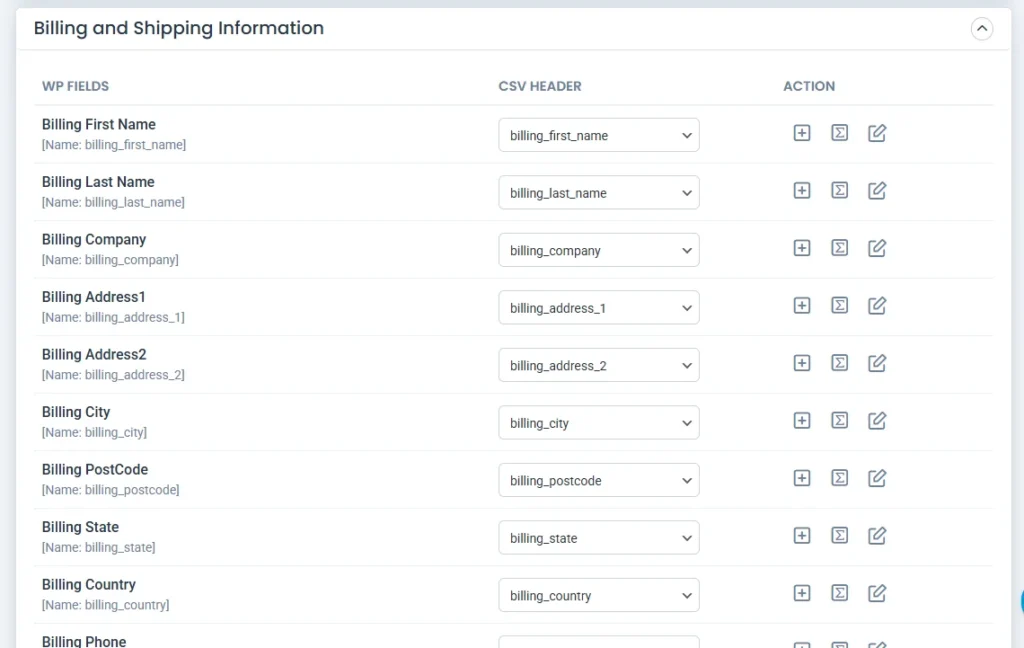
Ensure you map all relevant customer details, including billing and shipping information.
Once done, save the mapping template with a name at the bottom of the page and click Continue to proceed.
Step 3: Import Settings Configuration #
On the import configuration page, you can configure important settings such as rollback, maintenance mode, and duplicate handling options. The duplicate handling feature prevents importing entries that already exist on your WordPress site.

Click Import, and the plugin will begin importing all customer records. The process will take a few minutes to complete.
Once the import is finished, a pop-up window will appear, prompting you to download the import log file to verify the status of each imported customer record.
Alternatively, you can check the WooCommerce > Customers page in your dashboard to view the imported records.
Export WooCommerce Customers Data #
To export customer data from WooCommerce, navigate to the Export tab in WP Ultimate CSV Importer, select WooCommerce Customers, specify a filename, choose a file format, and click Export.
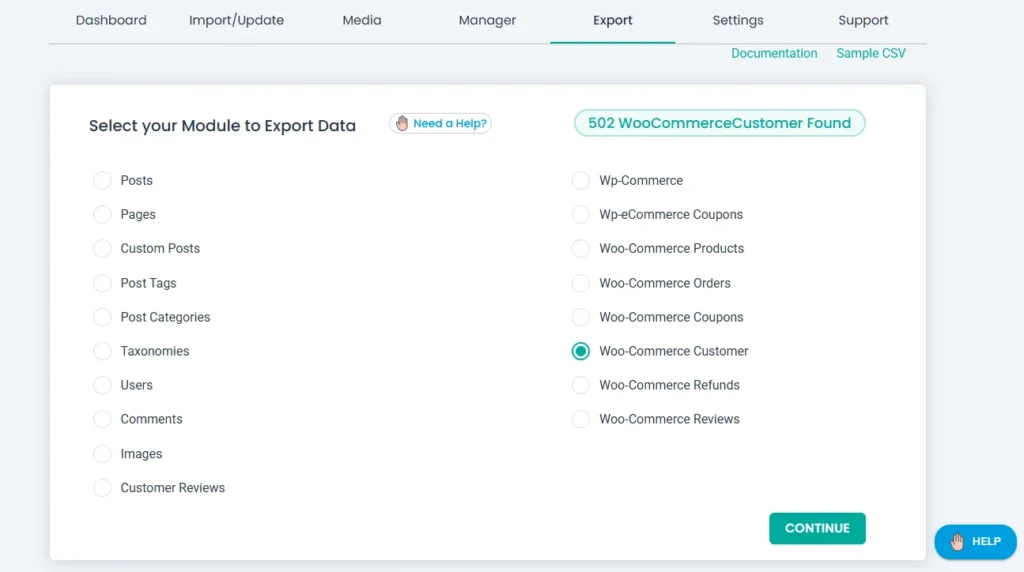
Step 1: Choose the Customers Module to Export #
Go to WP Ultimate CSV Importer > Export. The page will display all supported modules/post types. Click WooCommerce Customers from the list. The total customer count will be displayed, as shown in the screenshot below.
Step 2: Configure Export File Settings #
Click Continue and provide a filename for the exported WooCommerce customer data. Choose a file format from CSV, XML, XLS, or JSON.
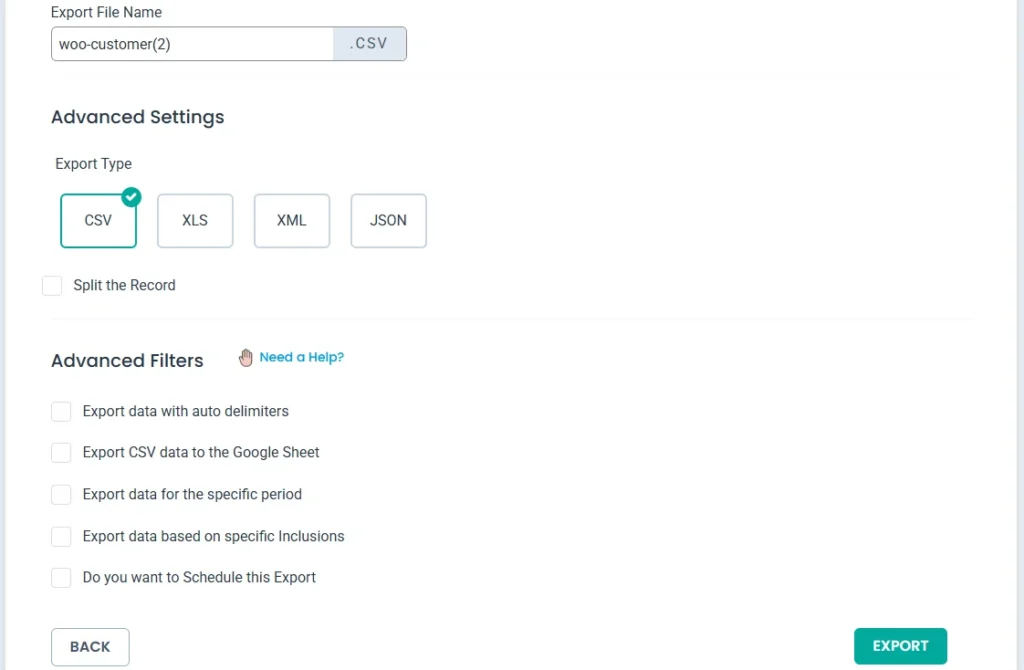
If you have a large dataset, enable the “Split the records” option to divide the data into multiple files, which will be compressed into a ZIP file for easier handling.
Step 3: Apply Advanced Filters #
You can configure advanced filters to export only specific data, such as customers created within a certain date range. If you apply filters, the plugin will extract only the records that match your criteria.
Step 4: Export WooCommerce Customer Data #
Click Export to instantly generate the WooCommerce customer data file in your selected format. Once the file is generated, you’ll see a Download button. Click it to download the exported WooCommerce customer data file.
FAQs #
1. How to Schedule WooCommerce Customer Imports?
You can schedule customer imports directly from the import configuration settings.
Enable the “Do you want to schedule this import?” option.
Configure the schedule time, date, frequency, and time zone.
Before scheduling, make sure you have set up a cron job in WordPress.
For detailed instructions, refer to this guide on how to enable and configure WP Cron Jobs.
2. WooCommerce Customers vs. Users Import
WooCommerce customers and WordPress users are related but have key differences:
WooCommerce Customers: Customers who have purchased from your store or registered via WooCommerce. Includes details such as billing/shipping addresses, order history, and account roles.
WordPress Users: Covers all user roles (Administrators, Editors, Authors, Contributors, and Subscribers), beyond just WooCommerce customers.
When importing:
Select WooCommerce Customers if importing store customers.
Select Users if importing other WordPress roles.