WP Ultimate CSV Importer easily import and export NextGen Gallery images into WordPress. To import images into the NextGen gallery plugin, navigate to the WP Ultimate CSV importer > Import/Update. Browse the import file, Map the NextGenGallery fields with WP core fields, import configuration settings.
Prerequisites #
Before starting the import, ensure that the following prerequisites are met:
- You have installed and activated the WP Ultimate CSV Importer plugin.
- You have the NextGEN Gallery plugin installed and activated on your WordPress site.
- Enable the Cron entry on our website for seamless image import. To enable the Cron, refer here
- Your images are hosted locally or have accessible URLs that can be imported.
- You have created the necessary NextGEN Galleries or Albums where the images will be imported.
Step-by-Step Guide to Import Images into NextGEN Gallery #
Step 1: Prepare Your CSV File #
You need a CSV file containing the image data you want to import. The CSV should have the following columns (at a minimum):
- Title (Optional): Title for the gallery or image.
- Image URL (Required): URL to the image file (if it’s hosted externally) or the relative path to the image file in your WordPress directory (if locally hosted).
- NextGen Gallery Name (Required): The name of the NextGen Gallery where the image will be added.
- NextGen Gallery ID (Required): The ID of your NextGen Gallery name.
- Description (Optional): Description of the image (if required).
- Tags (Optional): Tags or categories related to the image, if you want to organize your images.
Download the Sample CSV file.
Step 2: Set Up the Import in WP Ultimate CSV Importer #
- Navigate to the WP Ultimate CSV importer from the WordPress Dashboard.
- Choose the Import/Update option from the top side menu.
- Click on browse to upload your import file such as a CSV file
- Choose the data type as posts/pages/custom posts etc from the drop-down based on your business needs.
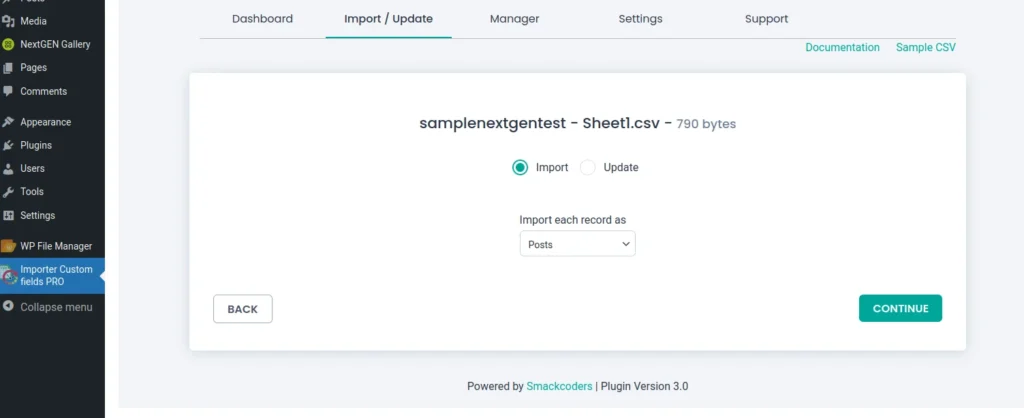
- Select the import type as Fresh import if you are importing new records. If you want to update the existing content you can choose the Update Content option.
- Click on Continue to move on to the Mapping Section
Step 3: Map Your Fields #
There are two types of Mapping on the WP Ultimate CSV importer.
Advanced Mode: Map the WP core fields and the CSV fields with the drop-down method.
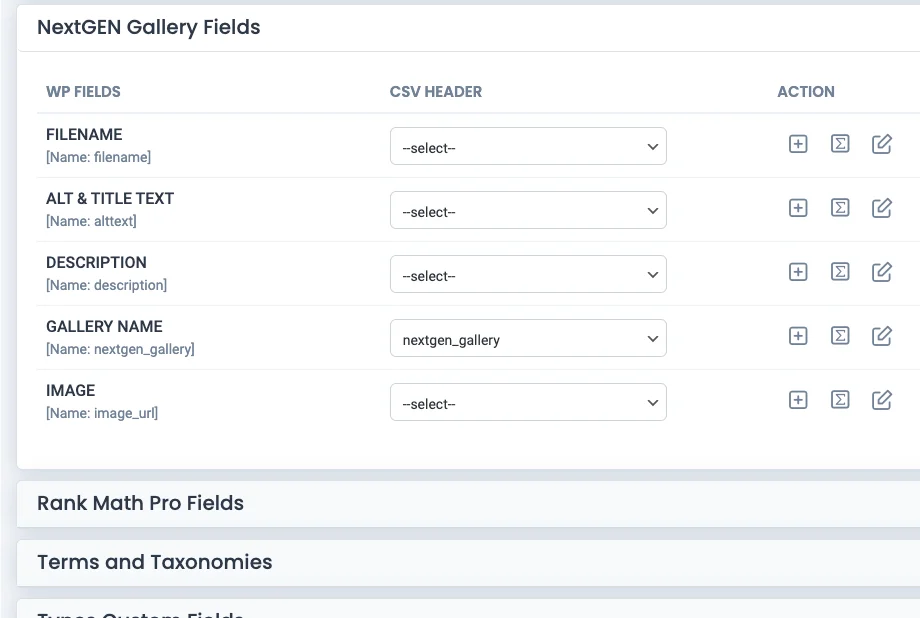
Drag and Drop: Map WP core fields and the desired CSV fields with the drag and drop method.
In this step, you will map the CSV columns to the appropriate fields in WordPress and NextGen Gallery.
- Map the Image Field:
- You should map the Image URL column from your CSV file to the Featured Image field in WP Ultimate CSV Importer.
- For example, select the column that contains the Image URL and drag it into the Featured Image box.
- If you are using locally hosted images, ensure that the file paths are correct (e.g., /wp-content/uploads/2024/beach.jpg).
- Map the Gallery (Optional):
- If you have a Gallery Name column in your CSV file and want to assign each image to a specific NextGen Gallery, you can map this column to the Gallery field in WP Ultimate CSV Importer.
- Note: Only If the gallery exists, the image will be added to it.
- Map Additional Data (Optional):
- Map other desired fields such as Title, Description, and Tags as necessary. These fields will help organize the imported images within the NextGen Gallery and provide relevant metadata.
4. Save the Mapping template
- Finally, save the mapping template with the unique name. You can also use the saved template for future imports.

WP Ultimate CSV Importer Pro
Get Ultimate CSV/XML Importer to import data on WordPress faster, quicker and safer.
Step 4: Configure the Import Settings #
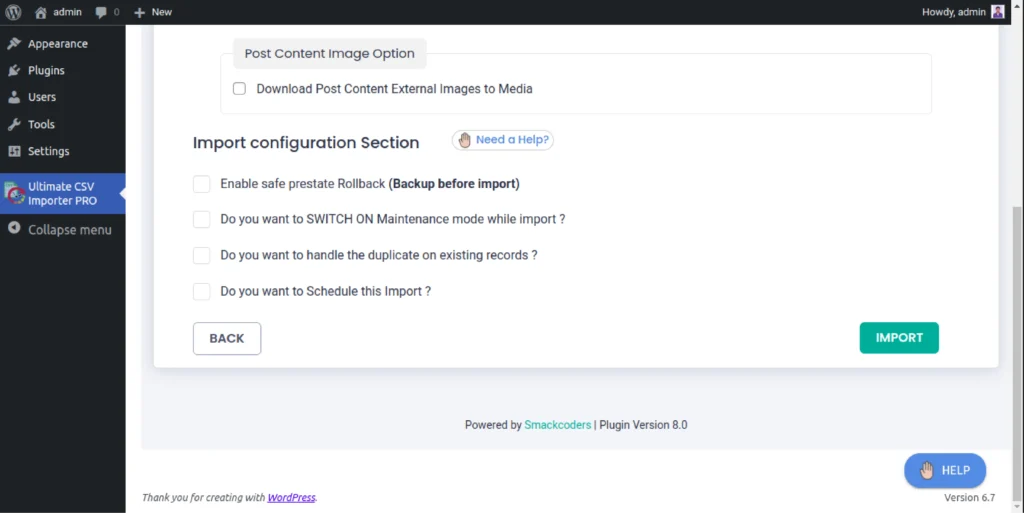
- Manage the media uploads by configuring media settings for effective handling of images on your data imports.
- Importing Images from External URLs: If your image URLs are external (i.e., hosted on another server), ensure that the Download Images option is enabled. This will download the image to your WordPress media library during the import process.
- Enable the rollback option to backup data before import. Also, you can switch on the maintenance mode while importing.
- You can also handle duplicates on existing records by configuring the import settings.
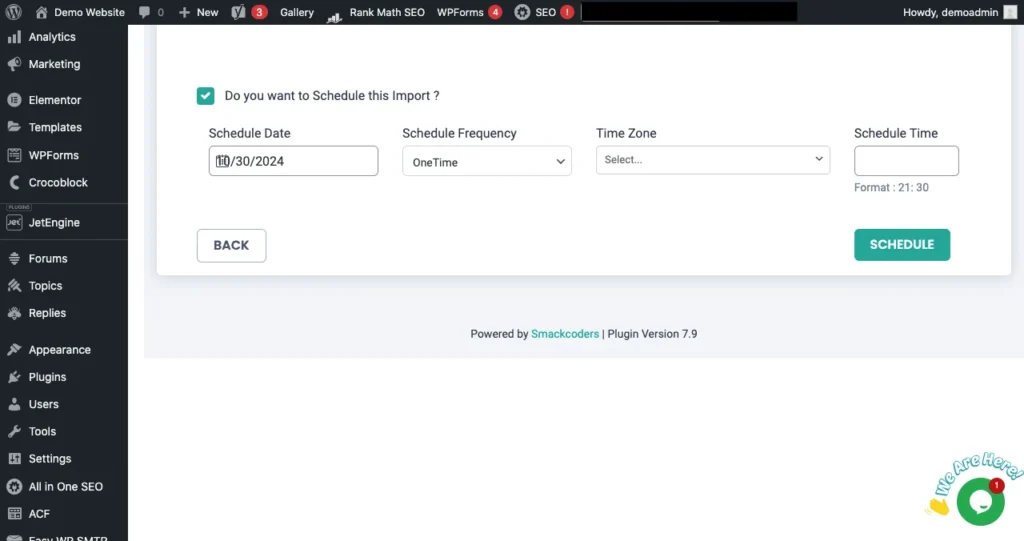
- Enable the Schedule import option, if you want to schedule your data import at your desired time.
- Once done, click on Import.
Step 5: Verify the Import #
Once the import is complete, go to NextGEN Gallery in your WordPress dashboard to verify the imported images.
- Check Galleries: Go to NextGEN Gallery > Manage Galleries and ensure that the images have been imported into the correct galleries.
- Check Image Metadata: Review the Title, Description, Tags, and any other fields you imported to make sure everything is correctly populated.
- View Front-End: Visit the gallery page on the front end of your site to ensure that the images are displayed correctly in the galleries.
Export NextGen Gallery Images #
To export NextGen gallery images from your WordPress site,
- Navigate to the WP Ultimate CSV importer Pro > Export
- Choose the Post type as posts, pages, or custom posts
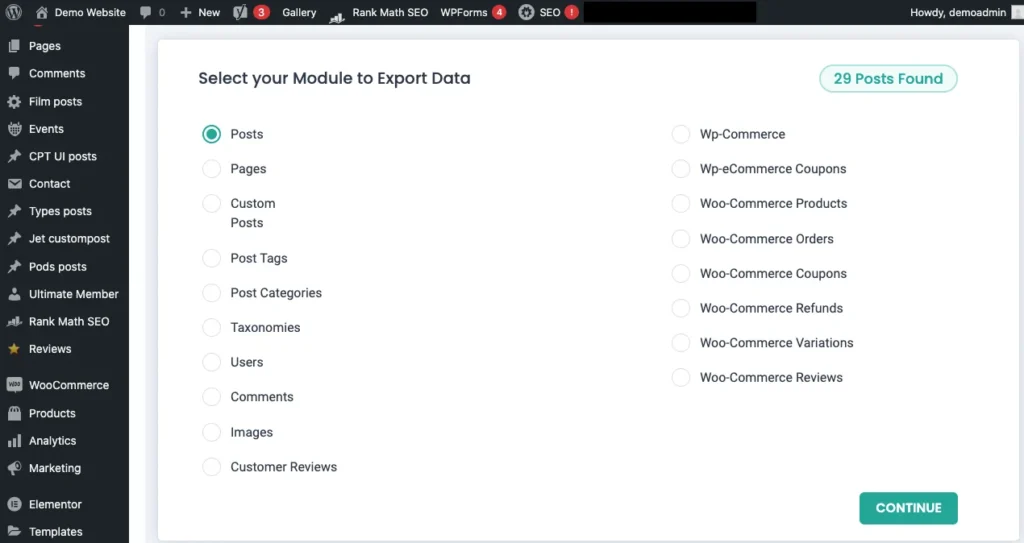
- Map the export file based on your business needs.
- Configure the Export settings by providing the file name, and file type.
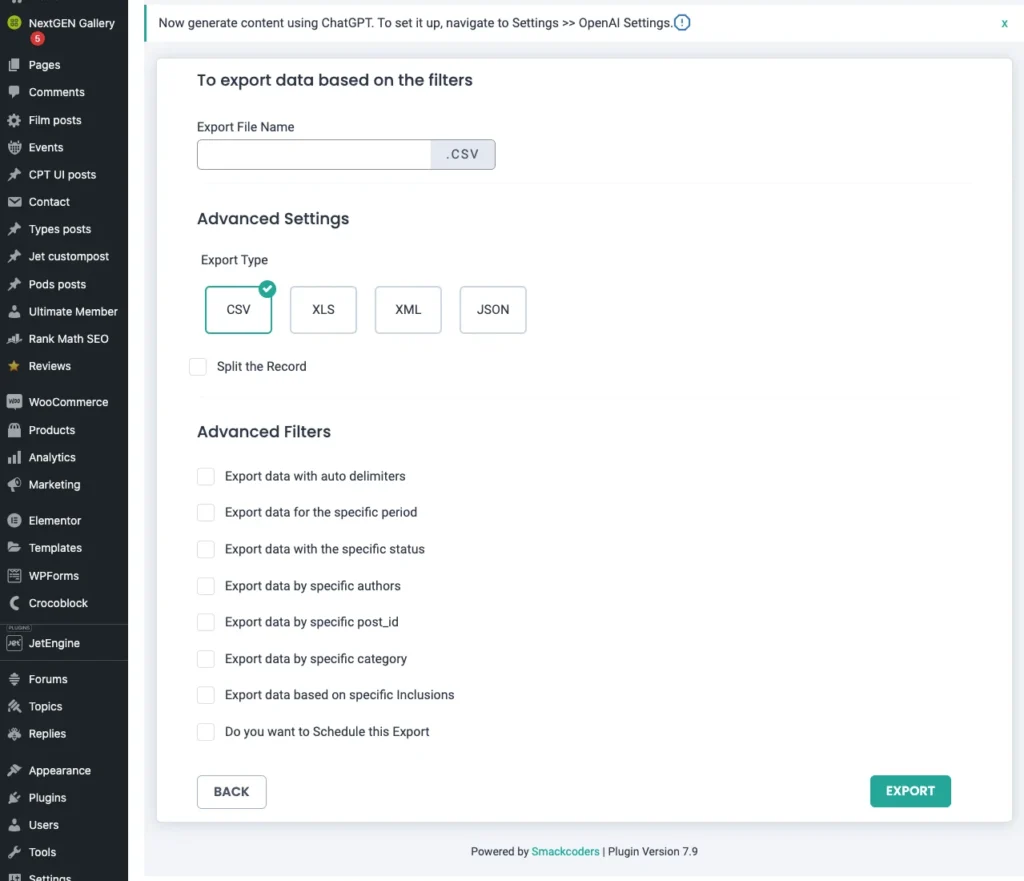
- Configure the Advanced filter to export your data more specifically. To know more about the advanced filter, refer to the exporter guide.
- You can also schedule the export at your desired time by enabling the schedule export option.
- Once done, click on Export.

WP Ultimate CSV Importer Pro
Get Ultimate CSV/XML Importer to import data on WordPress faster, quicker and safer.
Troubleshooting Tips #
1. Images Are Not Displaying in the NextGEN Gallery #
- Ensure that the Image URL in the CSV file is correct and publicly accessible. If you are using external URLs, test that they load in a browser.
- Check if the Download Images option is enabled in the import settings for external images.
- Ensure the correct Gallery Name is mapped and the gallery exists.
2. Image URLs Are Not Downloading #
- Verify that the Download Images option is enabled and your server allows remote requests (some servers block external URLs).
- Check the file permissions in the /wp-content/uploads/ directory to make sure WordPress can upload and store the images.
3. Import Fails or Times Out #
- Increase the PHP memory_limit and max_execution_time in your php.ini file if the import fails due to large image files or a lengthy process.
- Split large CSV files into smaller chunks if your import contains a large number of images.


