The WP Ultimate CSV Importer plugin now supports the import and export of Users with multiple user roles using the Members plugin. This allows you to assign multiple roles to your WordPress users during import, allowing them to access your website with assigned roles.
How to Import Users with Multiple User Roles #
Step 1: Prepare Your File #
Ensure your import file (CSV, Excel, or XML) contains the required user fields like user login, user password, first name, last name, etc., and the multi_user_role field data. Add a column named multi_user_role to specify user roles. Specify roles like editor, contributor, admin, subscriber, and separate multiple roles with pipelines (e.g., editor|subscriber).
Download the example Users with members CSV file that includes all Users fields and multi-user roles field with data.
Step 2: Create a New Users Import #
Navigate to WP Ultimate CSV Importer > Import/Update. Upload your file from the desktop or other location. Select Users as the post type from the dropdown. By default, ‘Fresh Import’ is selected. If you want to update existing user records, make sure to choose the ‘Update Content’ option.
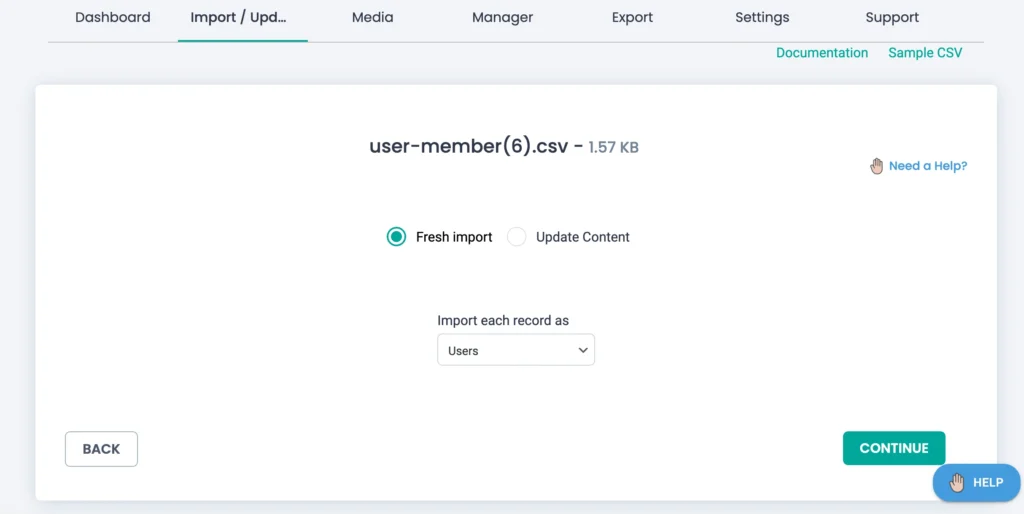
Click Next to proceed.

WP Ultimate CSV Importer Pro
Get Ultimate CSV/XML Importer to import data on WordPress faster, quicker and safer.
Step 3: Map Data to Users and Multi-User Role Field #
In the Mapping screen, map core user fields (e.g., username, email, password). Also, map the multi-user role field in the Custom Fields Member Fields widget. If you use drag and drop mode for mapping, drag the multi_user_role field to the corresponding custom field. Ensure other custom fields or meta fields are mapped correctly.
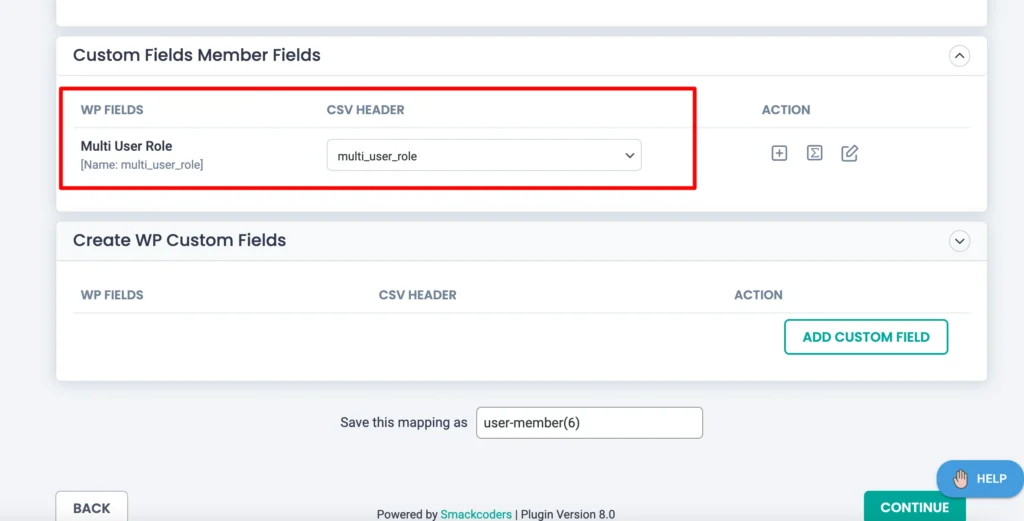
Step 4: Configure Import Settings & Run Import #
Click Continue. The next page will show the manage media uploads and import configuration section. Leave the manage media uploads section as we don’t import images. In the Import Configuration Settings step, you can configure some essential options to be configured before the import. Configure options like maintenance mode, rollback, or duplicate handling for safer import if needed.
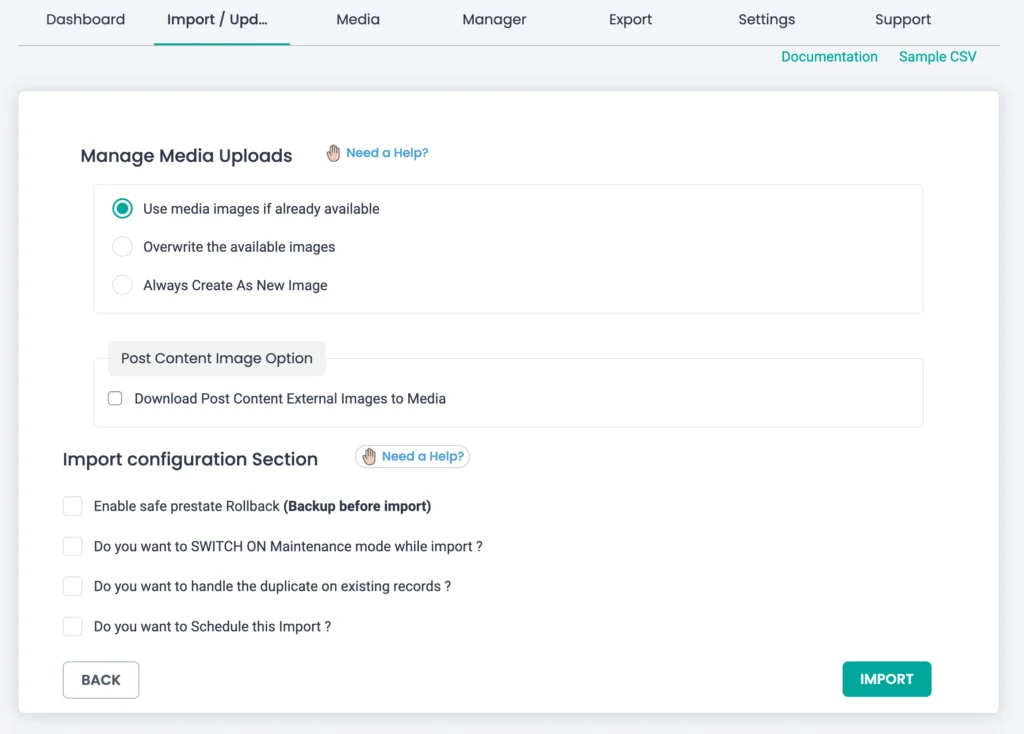
Choose an identifier field (e.g., username or ID) to avoid duplicates imported from the ‘Do you want to handle the duplicate on existing records?’ option. Once you review and confirm the import settings, click Import.
After the import is completed, review the logs to ensure all records were processed successfully. Go to Users > All Users to verify that users and their roles were imported correctly.
You can also schedule the import by enabling the ‘Schedule Import’ option. Learn more about scheduled imports here.
How to Export Users with Members Multi-user roles data #
Step 1: Configure Users as Export Module #
Navigate to WP Ultimate CSV Importer > Export. Select Users from the provided list of modules and click continue.
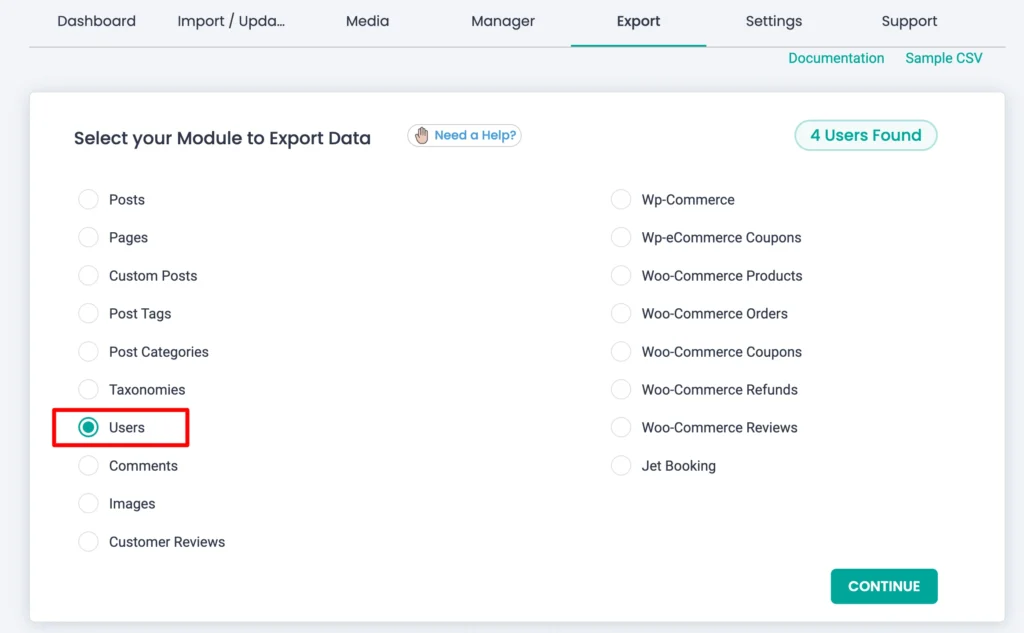
Step 2: Configure Advanced Export Settings #
Enter the desired file name and select the type. You can select the file format for export such as CSV, XML, JSON, or XLS. WP Ultimate CSV Importer also provides the option to export data to Google Sheets. Learn how to configure Google Sheets and export data here configure Google Sheets and export data to it here. Use other Advanced Filters to refine your export data, such as filtering by specific roles or custom fields. If no filters are needed, proceed to export all user data.
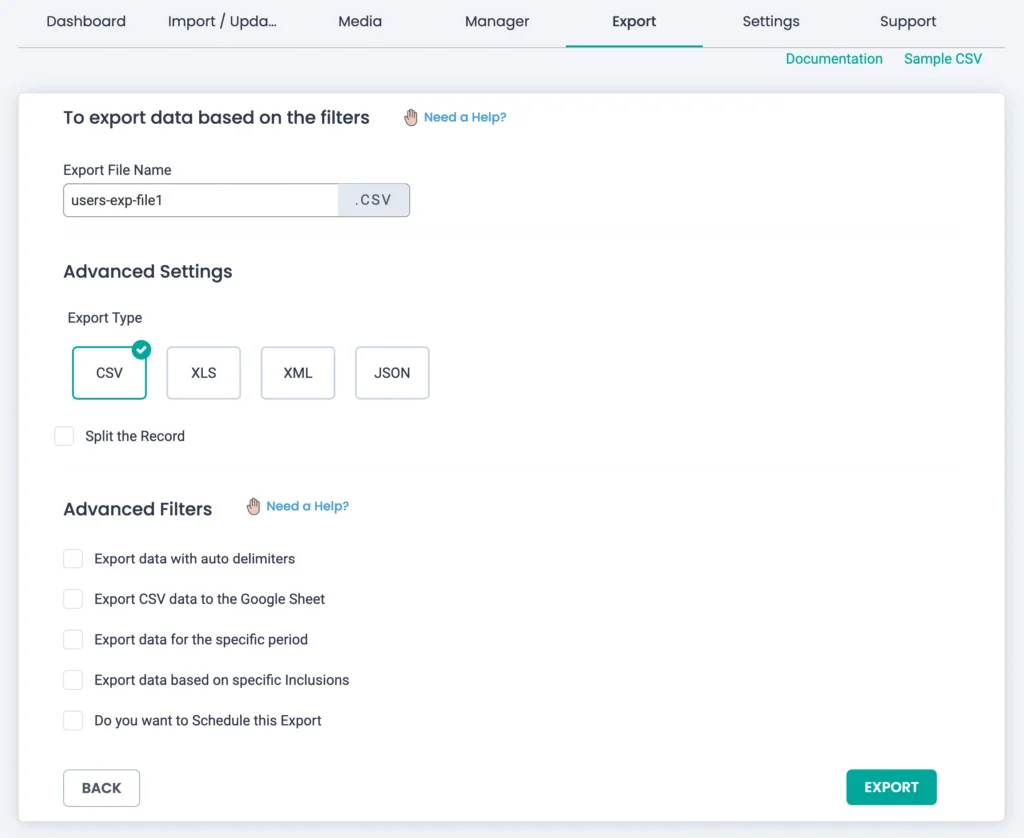
Step 3: Run the Export and Download the File #
Click ‘Export’ to generate the file in your selected format. Once the export is complete, click Download to save the file locally. Open the downloaded file to ensure that all user data, including the Members multi-user field, is correctly exported.

WP Ultimate CSV Importer Pro
Get Ultimate CSV/XML Importer to import data on WordPress faster, quicker and safer.
